eSmarts
A Modern Education and LMS Theme
- created: 11/16/2017
- latest update: 09/19/2019
- by: Elated Themes
- helpcenter.qodeinteractive.com/
eSmarts - A Modern Education and LMS Theme
1. Getting Started
Hi, and welcome to the eSmarts User Guide. The User Guide covers all the information needed to use the eSmarts theme to build an amazing website, as well as some helpful tips and tricks that will make your experience working with the eSmarts theme easier and more enjoyable. If you need any additional assistance while using our theme, you can always submit a ticket to our support forum at https://helpcenter.qodeinteractive.com and our support team will be glad to help you out.
You can navigate through different sections of the User Guide by clicking on the links in the menu to the left of your screen. You will also notice that we have highlighted certain parts of the text throughout the User Guide, such as important pieces of information, useful tips, and helpful code snippets, with different formatting for an easier overview. Here are some examples of the different formatting we use for Useful Tips, and Code Snippets:word
<div class="code-snippet">This is a helpful code snippet</div>
In this first section of the eSmarts User Guide we will go through the essential steps required to start building your website with the eSmarts theme. We will explain how to install the theme, import the included demo content, as well as how to update the theme. At the end of this section you will also find a set of Frequently Asked Question related to troubleshooting the theme.
Installing eSmarts
After downloading the eSmarts installation file from ThemeForest, extract it and in the extracted folder locate the esmarts.zip file. You can then install the eSmarts theme using one of the two following installation methods:
-
WordPress upload - For most users, this is probably the simplest installation method. To install the eSmarts theme using this method, please follow these steps:
- Login to your WordPress admin panel
- Navigate to Appearance > Themes > Add New > Upload Theme
- Click on Choose File and select esmarts.zip
- Click on Install Now
-
FTP upload - If you would like to install the eSmarts theme via FTP, please follow these steps:
- Extract the esmarts.zip file you previously located. You should now see a folder named esmarts
- Using an FTP client, login to the server where your WordPress website is hosted
- Using an FTP client, navigate to the /wp-content/themes/ directory under your WordPress website's root directory
- Using an FTP client, upload the previously extracted esmarts folder to the themes directory on your remote server
Once the installation is complete, your eSmarts theme will be ready for use. Now all you need to do is navigate to Appearance > Themes and activate the eSmarts theme. After you have done this, you should see Elated Options appear in the left navigation bar of your WordPress admin panel.
You should also see a notification at the top of the screen that required plugins need to be installed. Please install and activate all of the required plugins, since they are necessary for the theme to function properly.
Importing Demo Content
With the eSmarts theme, you have the option to either start creating your site from scratch, or choosing to import one of the included demo sites to use as a starting point, and then modifying it to suit your needs. In this section we will explain how to do the latter.
eSmarts comes with a one-click import module. To import one of the included demo sites, please follow these steps:
- Login to your WordPress admin panel
-
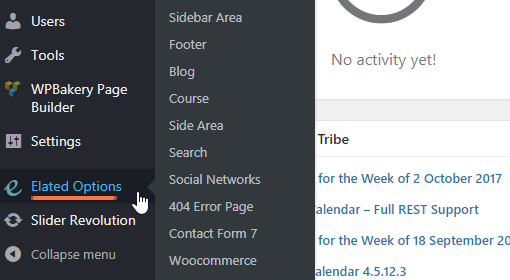
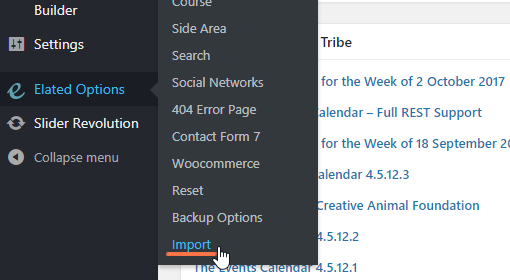
Navigate to Elated Options > Import
- From the Import dropdown menu, choose the demo site that you would like to import
-
From the Import Type dropdown menu, choose what type of content you'd like to import:
- All - imports pages, content, widgets, and settings. We recommend this for users who would like to import a demo site exactly as it appears on our live demo.
- Content - imports only pages and their content. This option is recommended for users who would like to see how we've created our page layouts, but who want to keep their own settings in Elated Options.
- Widgets - imports only widgets. This option is recommended for users who would only like to populate the theme’s widget areas with the widgets from their chosen demo. No other content is imported.
- Options - imports settings in Elated Options only. This option is recommended for users who would like to achieve the same look and feel of their chosen demo site, but do not want to import any additional content.
- If you also wish to import media files (images, videos, sounds), make sure to set the Import attachments option to "Yes".
- Click on the Import button and wait for the import process to finish.
Updating eSmarts
You can update your theme by performing the following steps:
- Download the latest theme .zip file from ThemeForest
- Extract it and locate esmarts.zip
- Extract esmarts.zip and locate the esmarts folder
- Copy/Replace the contents of the esmarts folder to the /wp-content/themes/esmarts folder of your web site.
Troubleshooting FAQ
1. Why can't I save my menu?
WordPress by default has a limited number of menu items. When you import our demo content, which contains a lot of menu items, you might not be able to save changes you make to a menu. You can fix this problem by contacting your hosting and asking them to add the following lines to the php.ini file:
suhosin.post.max_vars = 5000
suhosin.request.max_vars = 5000
2. Why is there a smiley displayed on blank pages?
This problem is most likely related to JetPack and memory settings of your hosting. You can either disable JetPack or read what the JetPack developer wrote: Regarding the memory limit, please refer to the WordPress Codex section concerning this problem. Some sites that load many plugins alongside WordPress ultimately require a higher memory limit than WordPress defaults to, but since this is limited to specific hosts and configurations, it must be dealt with on an individual basis. You'll find the Codex article at: http://codex.wordpress.org/Common_WordPress_Errors#Allowed_memory_size_exhausted
3. How do I optimize my site?
Please use this tool to investigate reasons for slow loading: https://developers.google.com/speed/pagespeed/insights/?hl=en
4. How to translate or rename default theme labels?
You can use the Poedit software (http://poedit.net/wordpress) to translate/rename all the theme's labels. Another solution is to edit the theme folder/languages/en_US.po file directly in a text editor and manually edit the labels you want to translate.
5. Why do I see a white screen when importing demo content?
If you get a white screen or some other error when trying to import our demo content, this probably happens because of the maximum execution time limit. You need to increase the maximum execution time (upload time) setting of your web server. The default maximum execution time on web servers is 30 seconds. Please increase it to 120 seconds. Possible ways of achieving this are:
- By Wp-config.php changes - set_time_limit(120);
- In htaccess - php_value max_execution_time 120;
- In php.ini file - max_execution_time = 120
Ask your hosting provider to take care of this for you.
2. Using eSmarts
Once you've installed eSmarts, you can start building your site. In this section of the User Guide we will explain how you can set up your header, upload your logo, create your menu, set up your footer area, customize the general look and feel of your website, and create your first pages.
Setting Up the Header
One of the first things you might want to do after you have installed and activated your eSmarts theme is to set up your header area. The header contains the logo, menu, search bar, side area icon, and other optional widgets.
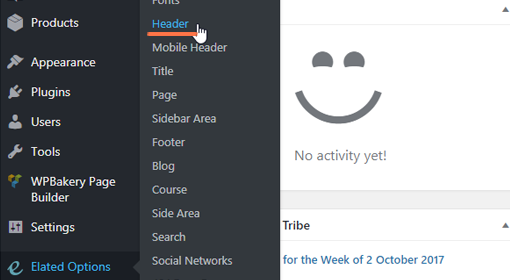
To set up your header, navigate to Elated Options > Header from your WordPress admin panel. The settings you define here will be the default settings for all pages on your site. If you need any help in further understanding any of these options, please refer to the Elated Options section of this User Guide.
Some options, such as the header skin and background color, can be overridden on a page to page basis from a specific page’s backend. For more information on how local page settings work, please refer to the Pages section of this User Guide.
Uploading Your Logo
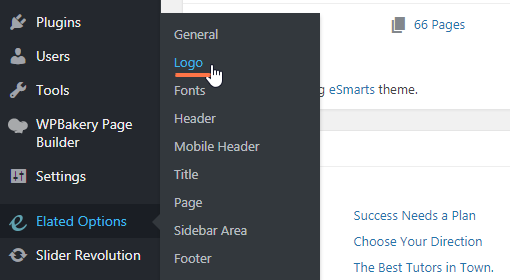
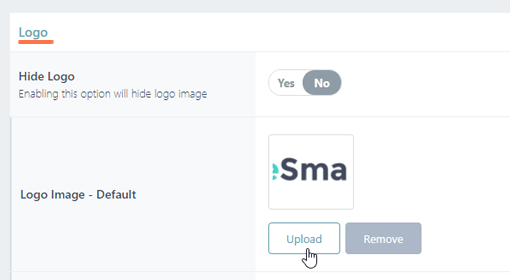
To add your logo to the header, navigate to Elated Options > Logo from your WordPress admin panel and click the upload button next to the Logo Image – Default field. After you upload your image and save the options, you should have a visible logo in your header area. For more information regarding the various logo types that can be uploaded, please refer to the Elated Options section of this User Guide.
Menu Creation
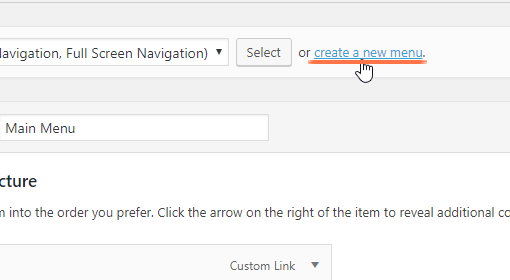
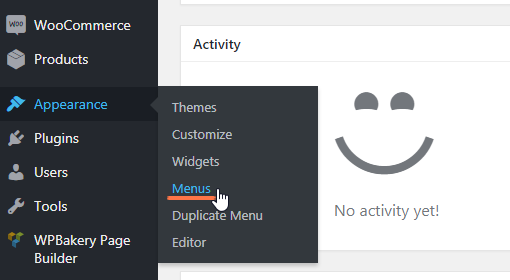
To create a new menu, navigate to Appearance > Menus from your WordPress admin panel and click on Create a new menu. Enter a name for your new menu and then click Create Menu.

Every page that you have created will be listed in the section on the left named Pages. Simply check the pages that you would like to add to your menu and click the Add to Menu button. Once you have added pages to your menu, you can click and drag the menu items to rearrange them, or nest them one underneath the other.

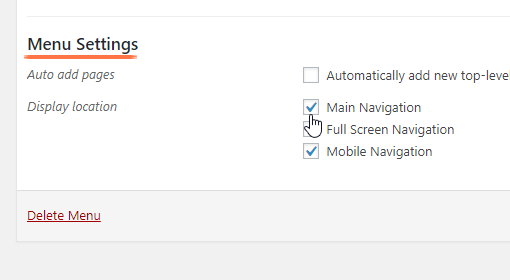
In the Menu Settings section (which is located underneath the Menu Structure section), check the checkbox next to Main Navigation and click Save Menu. This will activate the menu you have just created, and you should now see a functional menu in your header.
Footer
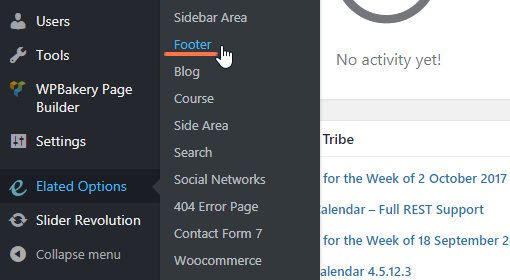
To set up your footer, navigate to Elated Options > Footer from your WordPress admin panel.
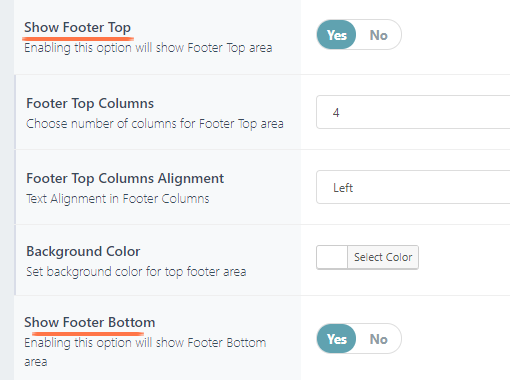
The settings you define here will be the default settings for all pages on your site. If you would like both the top and bottom footer areas to be displayed, make sure that both the Show Footer Top and Show Footer Bottom options are enabled. If you need any help understanding any of these options, please refer to the Elated Options section of this user guide.
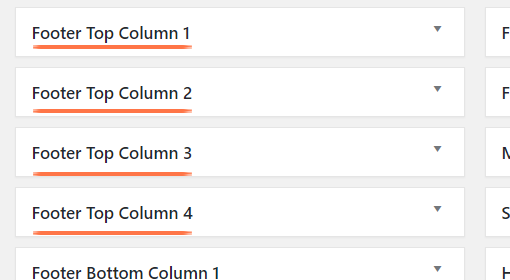
Content is added to your footer via widgets. Navigate to Appearance > Widgets from your WordPress admin panel. On the right side of your page you will see the widget areas for your footer. The widget areas for the top footer are named Footer Column 1, Footer Column 2, Footer Column 3, and Footer Column 4. On the left side of the Widgets page you will see the available widgets. To add a widget to one of the Footer widget areas, simply drag the desired widget to one of the Footer Column widget areas on the right.

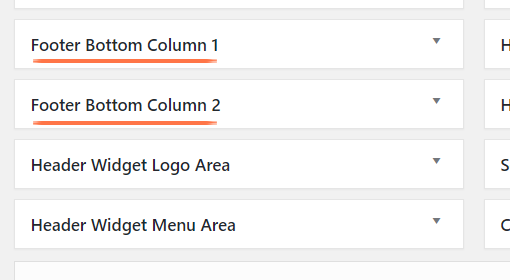
To add content to the bottom footer, simply add widgets to the Footer Bottom widget area, or the Footer Bottom Left and Footer Bottom Right widget areas.
General Look and Feel
Now let’s set up the general look and feel of your site. If you have imported a demo site and would like to keep its general look and feel, then you do not need to do anything else. Otherwise, go to Elated Options > General and in the Font Family field set a default font family for your site. Next, in the First Main Color field set a default main color for your site.

Now that you have set up the basic elements for your site, you’re ready to start building your pages.
Building Pages
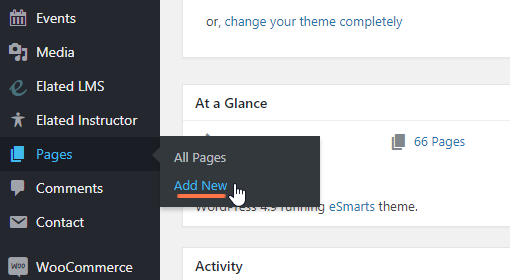
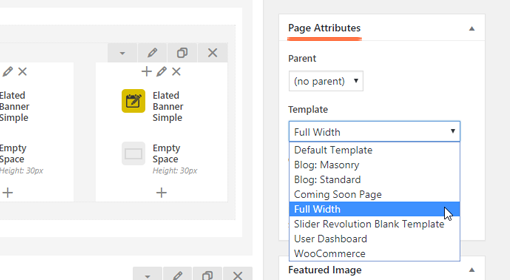
To create a new page, navigate to Pages > Add New from your WordPress admin panel. In the text field near the top of the screen enter a title for your page. After you have added a title, choose the “Full width” template from the section on the right named Page Attributes. This will allow you to add sections to your page that span across the whole width of the screen.

In the bottom section of your screen you will find local page settings. Any settings that you define here will override the global settings set in Elated Options.
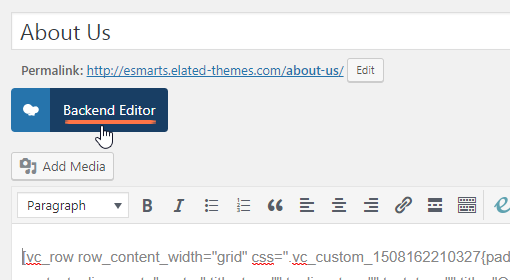
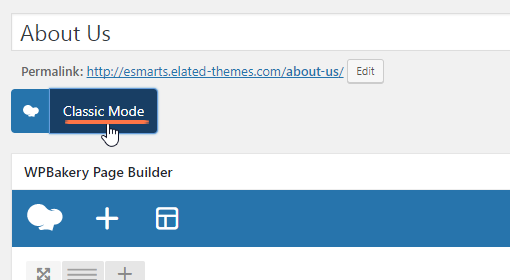
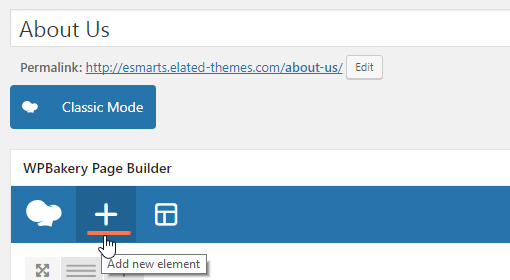
To start adding elements to your page, first make sure that you are in the backend editor view. If the blue button near the top left of the page says BACKEND EDITOR, click on it to enable the Visual Composer page builder view. Once you’re in the Visual Composer view, the blue button will say CLASSIC MODE. You can now click on the Add Element button to start adding elements to your page. You can learn more about elements in the Custom Shortcodes section of this user guide.
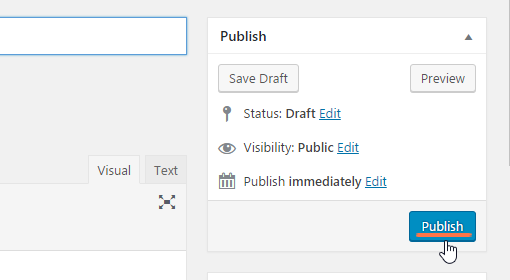
Finally, click the Publish button in the upper right section of the page. (If you made some changes on an already published page, you will see an Update button instead).
3. Pages
In this section of the User Guide we will discuss page creation in more detail, including the various page templates available in the theme, and all the page specific options.
When creating a new page, one of the first things you will probably want to do is to choose an appropriate template for your page. To this this, visit your page from the backend (or create a new page by going to Pages > Add new), and locate the Page Attributes section on the right side of the screen. eSmarts comes with a variety of page templates to choose from:
- Default Template - Select this template if you would like to create a standard page with your content inside the grid.
- Blog: Masonry* - Select this template to display a list of your blog posts on the page. The blog list will be displayed in a Masonry type grid.
- Blog: Standard* - Select this template to display a list of your blog posts on this page. The blog list will be displayed in the Standard layout (post info text located underneath the featured image).
- Coming Soon Page - Choose this template to create a page with no header or footer.
- Full Width - Select this template if you would like to create a standard page with your content spanning across the full width of the page.
*All of the blog templates listed above are used for displaying blog posts in various manners.
Now that you have chosen an appropriate template, let’s go over the custom fields available for pages.
Elated General
- Always Put Content Behind Header - Set this option to "Yes" if you would like the header to cover the top of the page content.
- Content Style - Define styles for the page content.
- Slider Shortcode - If you wish to have a slider on the top of your page, copy and paste the slider shortcode here.
- Page Background Color - Set a background color for this page.
-
Boxed Layout - Set this option to "Yes" to enable the boxed layout. If you choose a boxed layout for this page, the content will be fitted in a centrally positioned grid.
- Page Background Color - Set a background color for outside the boxed content.
- Background Image - Set a background image for the content outside the box.
- Background Pattern - Set a background pattern for the content outside the box.
- Background Image Attachment - Choose whether the background image will be fixed or can be scrolled.
-
Passepartout - Set this option to "Yes" if you would like to display a passepartout border around this page.
- Passepartout Color - Set a color for the passepartout.
- Passepartout Size - Set a size for the passepartout.
- Responsive Passepartout Size - Set a size for the passepartout border when viewed on smaller screens.
- Disable Top Passepartout - Set this option to "Yes" if you would like to disable the top passepartout border.
- Initial Width of Content - Set a width for the grid on this page.
-
Smooth Page Transitions - Set this option to "Yes" if you would like to enable smooth loading transitions on this page.
-
Enable Preloading Animations - Set this option to "Yes" to enable an animation while the page is loading.
- Page Loader Background Color - Set a background color for the page while it is loading.
- Loader Style - Choose a type of loader and a color for it.
- Enable Fade Out Animation - Set this option to "Yes" to enable a fade out animation when navigating away from this page.
-
Enable Preloading Animations - Set this option to "Yes" to enable an animation while the page is loading.
- Show Comments - Set this option to "Yes" to display comments on this page.
Elated Blog
- Blog Category - Choose a category of posts to display (only if you are using one of the blog list templates for this page).
- Number of Posts - Set a number of posts to display (only if you are using one of the blog list templates for this page).
- Masonry Layout - Choose whether you would like Masonry blog lists to be in grid or full width.
- Masonry - Number of Columns - Choose a number of columns to display Masonry blog lists in.
- Masonry - Space Between Items - Choose a predefined spacing between posts in Masonry blog lists.
- Featured Image Proportion - Choose a proportion for your blog list featured images. Depending on the proportion you choose, you can set dimensions of the featured image for each of your blog posts individually.
- Pagination Type - Choose a pagination type to use on blog lists.
- Number of Words in Excerpt - Define a maximum number of words to display in blog post excertps.
Elated Sidebar
- Layout - Choose the desired layout for your sidebar. You can also disable the sidebar here by choosing "No Sidebar".
Elated Logo
- Logo Image - Default - Upload a default logo to display in the header on this page.
- Logo Image - Dark - Upload a dark style logo to display in the header on this page.
- Logo Image - Light - Upload a light style logo to display in the header on this page.
- Logo Image - Sticky - Upload a logo to display in the sticky header on this page.
- Logo Image - Mobile - Upload a logo to display in the mobile header on this page.
Elated Header
- Choose Header Type - Choose a header type to use on this page. Depending on the header type you choose, different options will be available.
- Header Skin - Here you can choose a header style to be applied to the header on this page. The "Light" header style displays white navigation text and the "Light" logo version, while the "Dark" header style displays black navigation text and the "Dark" logo version. If you wish to use the default colors and logo, leave this field empty.
- Choose Header Behavior - Choose a behavior for the header on this page.
Top Area
-
Header Top Bar - Set this option to "Yes" to display the header top bar.
- Top Bar in Grid - Set this option to "Yes" if you would like to place the top bar content in grid.
- Top Bar Background Color - Set a background color for the header top bar.
- Top Bar Background Color Transparency - Set a transparency (0-1) for the top bar background.
-
Top Bar Border - Set this option to "Yes" to display a bottom border on the header top bar.
- Border Color - Set a color for the border.
Logo Area Style
- Disable Header Logo Area Widget - Set this option to "Yes" to hide the Logo Area widget area.
- Logo Area in Grid - Set this option to "Yes" to place the logo area content in grid.
- Background Color - Set a background color for the logo area.
- Transparency - Set a transparency (0-1) for the logo area background
-
Logo Area Border - Set this option to "Yes" to display a bottom border on the logo area.
- Border Color - Set a color for the border area.
- Logo Padding - Set padding values for the logo area.
Menu Area Style
- Disable Header Menu Area Widget - Set this option to "Yes" to hide the Menu Area widget area.
- Menu Area in Grid - Set this option to "Yes" to place the menu area content in grid.
- Background Color - Set a background color for the menu area.
- Transparency - Set a transparency (0-1) for the menu area background.
- Menu Area Shadow - Set this option to "Yes" to enable a shadow effect on the menu area.
-
Menu Area Border - Set this option to "Yes" to display a bottom border on the menu area.
- Border Color - Set a color for the border area.
- Dropdown Position - Set a position for the dropdown menu. Input the value in percentages (where 100% is the full height of the header).
Vertical Area Style
- Background Color - Set a background color for the vertical header
- Background Image - Upload a background image for the vertical header.
- Disable Background Image - Set this option to "Yes" to hide the background image from the vertical header on this page.
- Shadow - Set this option to "Yes" to enable a shadow effect on the vertical header.
-
Vertical Area Border - Set this option to "Yes" to enable a border on the vertical header.
- Border Color - Set a color for the border.
- Center Content - Set this option to "Yes" to vertically center the content in the vertical header.
Elated Title
-
Show Title Area - Use this option to control whether you would like to display the title area or not on your website.
- Title Area Type - Chose a type of title area to use.
- Title Area in Grid - Set this option to "Yes" if you would like to set the title area content in grid.
- Height - Set a height for the title area.
- Background Color - Set a background color for the title area
- Background Image - Chose a background image for the title area.
- Background Image Behavior - Choose how you would like the background image to behave.
- Vertical Alignment - Define the vertical alignment setting for the title area content on this page. You can choose to vertically align the title area content from the bottom of the header, or from the top of your browser window.
- Custom Title Text - Input a custom title.
- Title Tag - Choose a heading tag for the title.
- Title Color - Choose a color for the title.
- Subtitle Text - Enter subtitile text to be displayed in the page title area.
- Subtitle Color - Set a color for the subtitle.
- Subtitle Side Padding - Input padding values for the subtitle.
- Breadcrumbs Color - Set a color for the breadcrumbs text.
Elated Footer
- Disable Footer for this Page - Set this option to "Yes" to disable the footer on this page.
- Show Footer Top - Set this option to "Yes" to enable the footer top area on this page.
- Show Footer Bottom - Set this option to "Yes" to enable the footer bottom area on this page.
4. Blog
In this section of the User Guide we will discuss the creation of blog posts and all the available options for each post, setting up pages to display blog listings, as well as how to change the date format for your posts.
Blog Posts
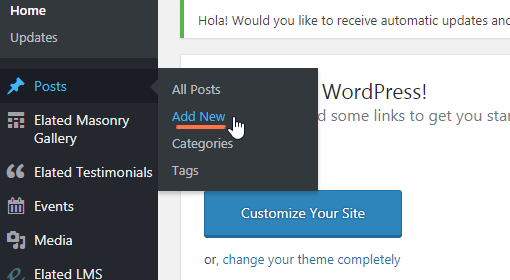
To create a new blog post, go to Posts > Add New from your WordPress admin panel. First, you need to enter a title for your blog post in the text field near the top of the screen. Then choose a format for your blog post in the Format section on the right side of the screen.
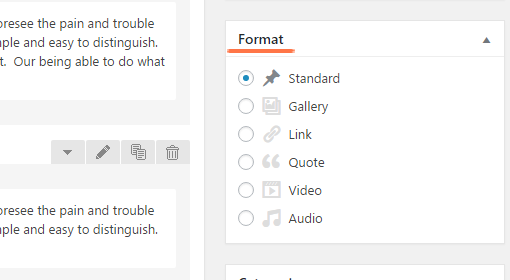
Let's take a look at the available blog post formats:
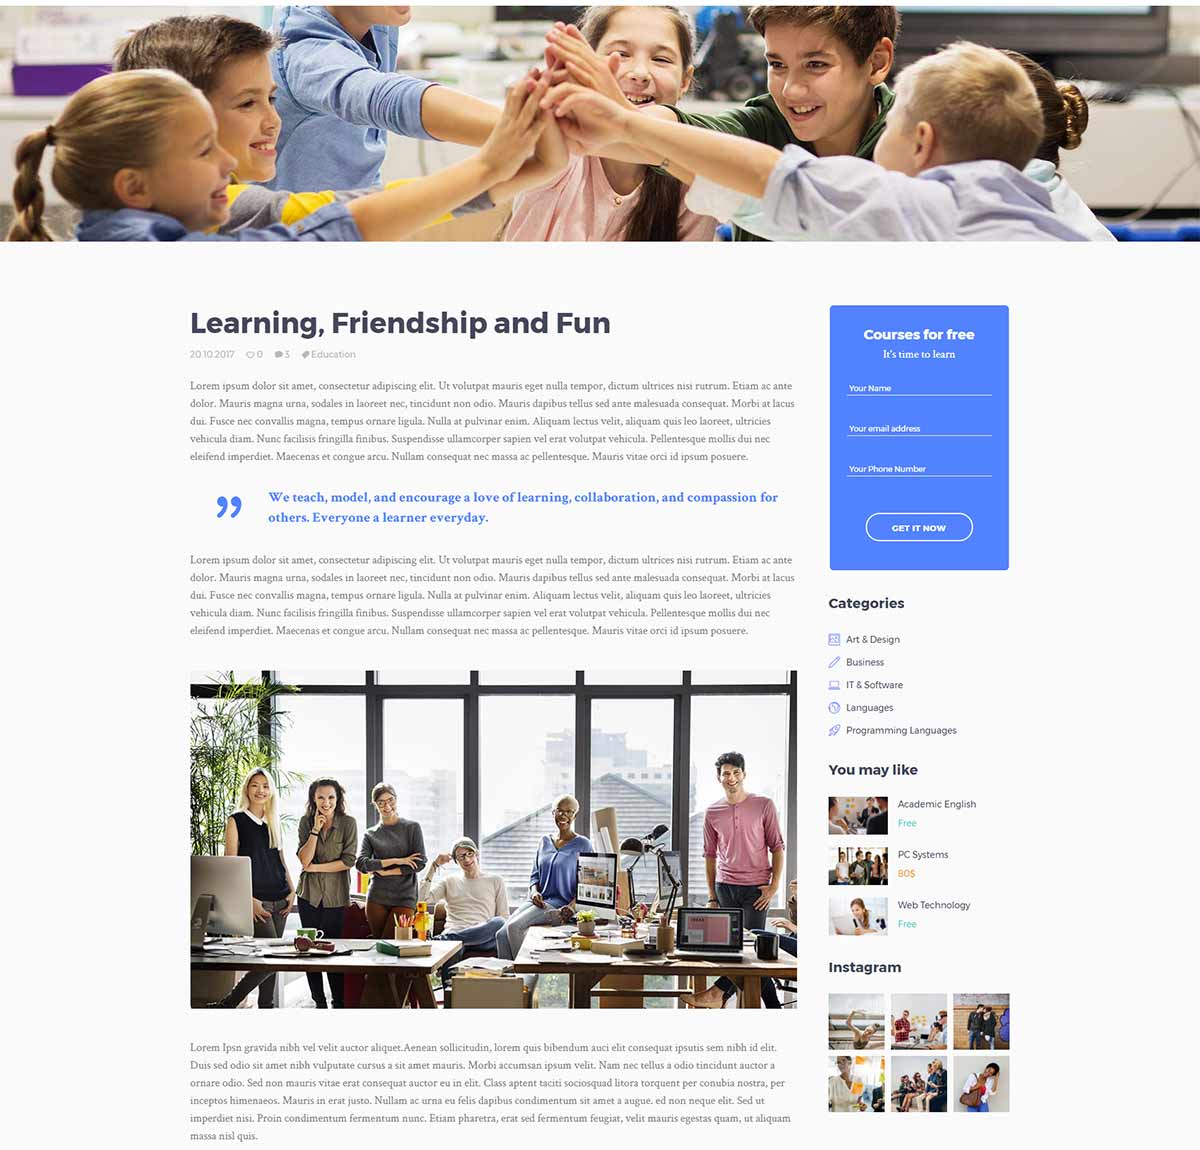
- Standard - This is the default blog format. You can start adding content with the Visual Composer page builder.
- Gallery - this format features an image gallery slider. In order for it to work, you need to add a gallery at the top of your page. A field named Elated Gallery Post Format will appear at the bottom section of the page, and here you can upload and add your gallery images.
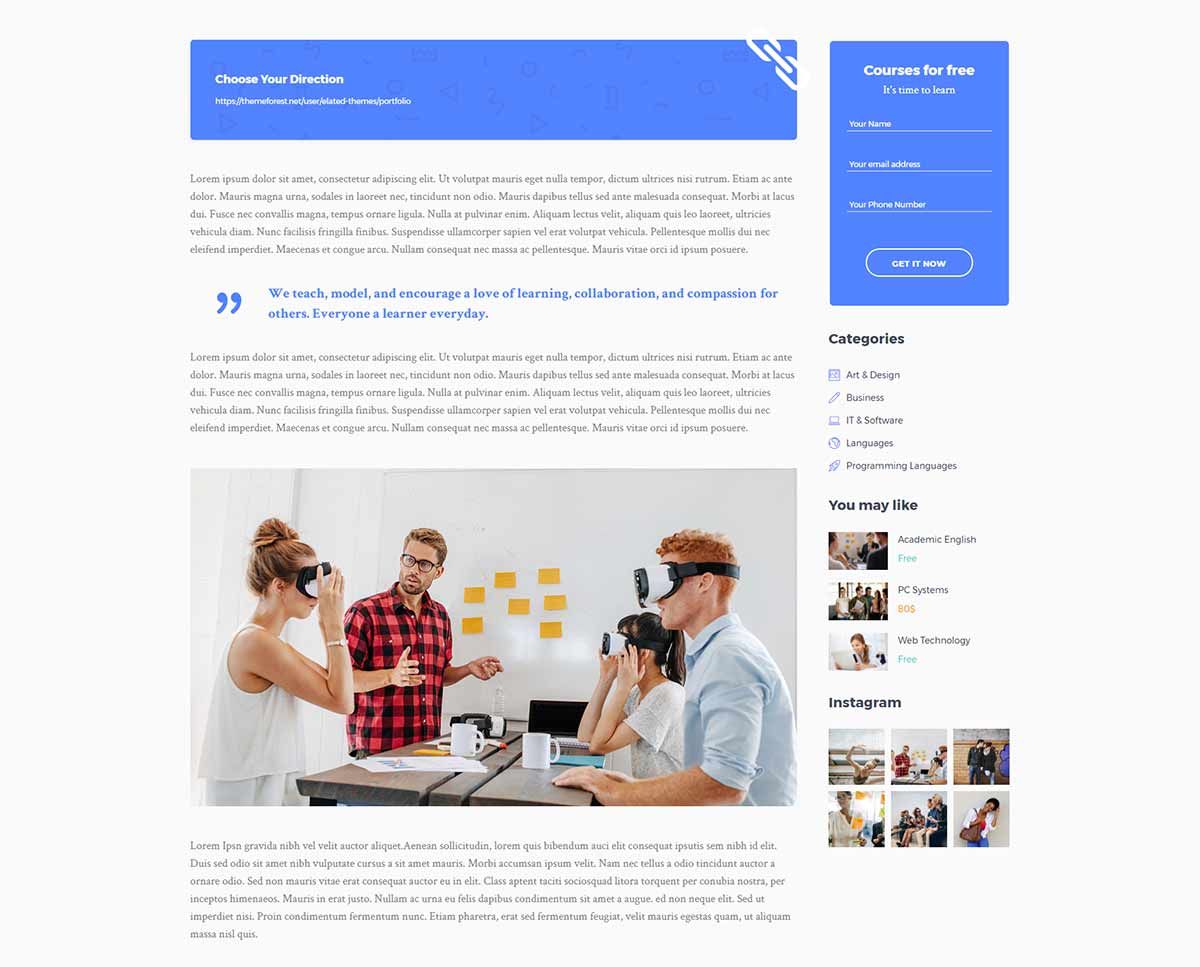
- Link - a field named Elated Link post format will appear at the bottom section of the page. Here you can enter the full URL of the page you would like to link to.
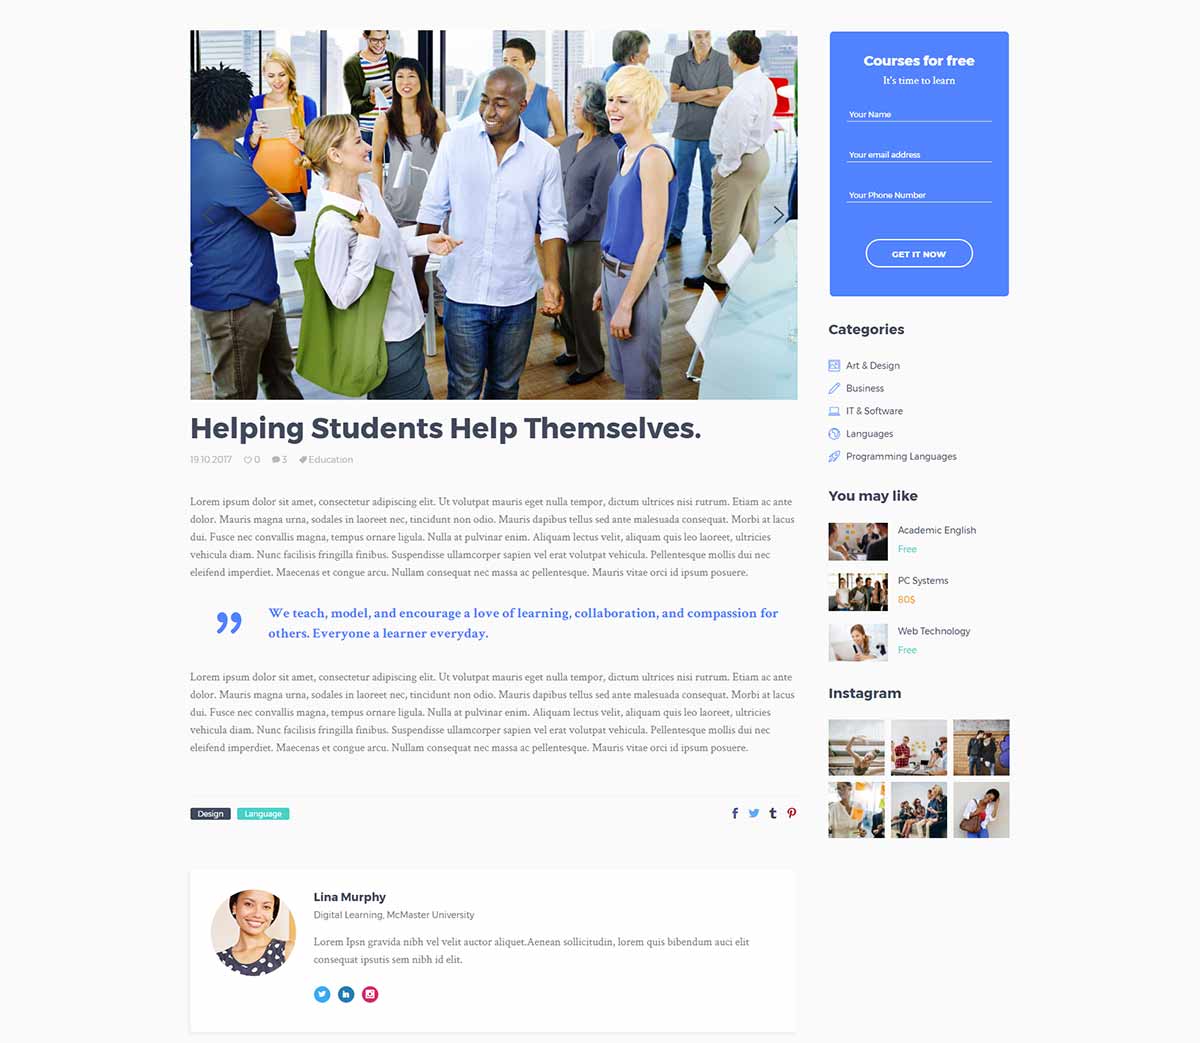
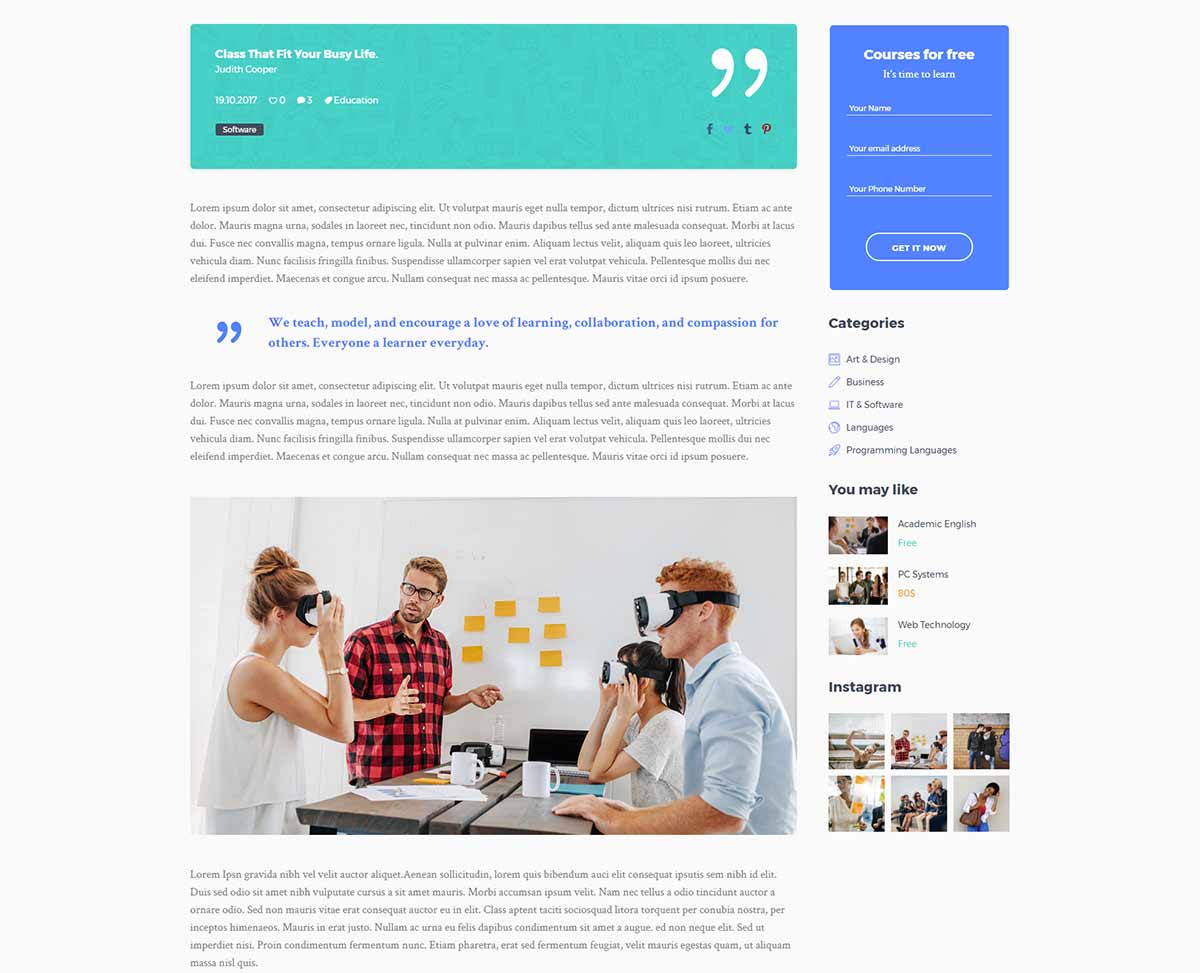
- Quote - a field named Elated Quote post format will unfold at the bottom section of the page. Here you can enter the quote you would like to display and the quotes author.
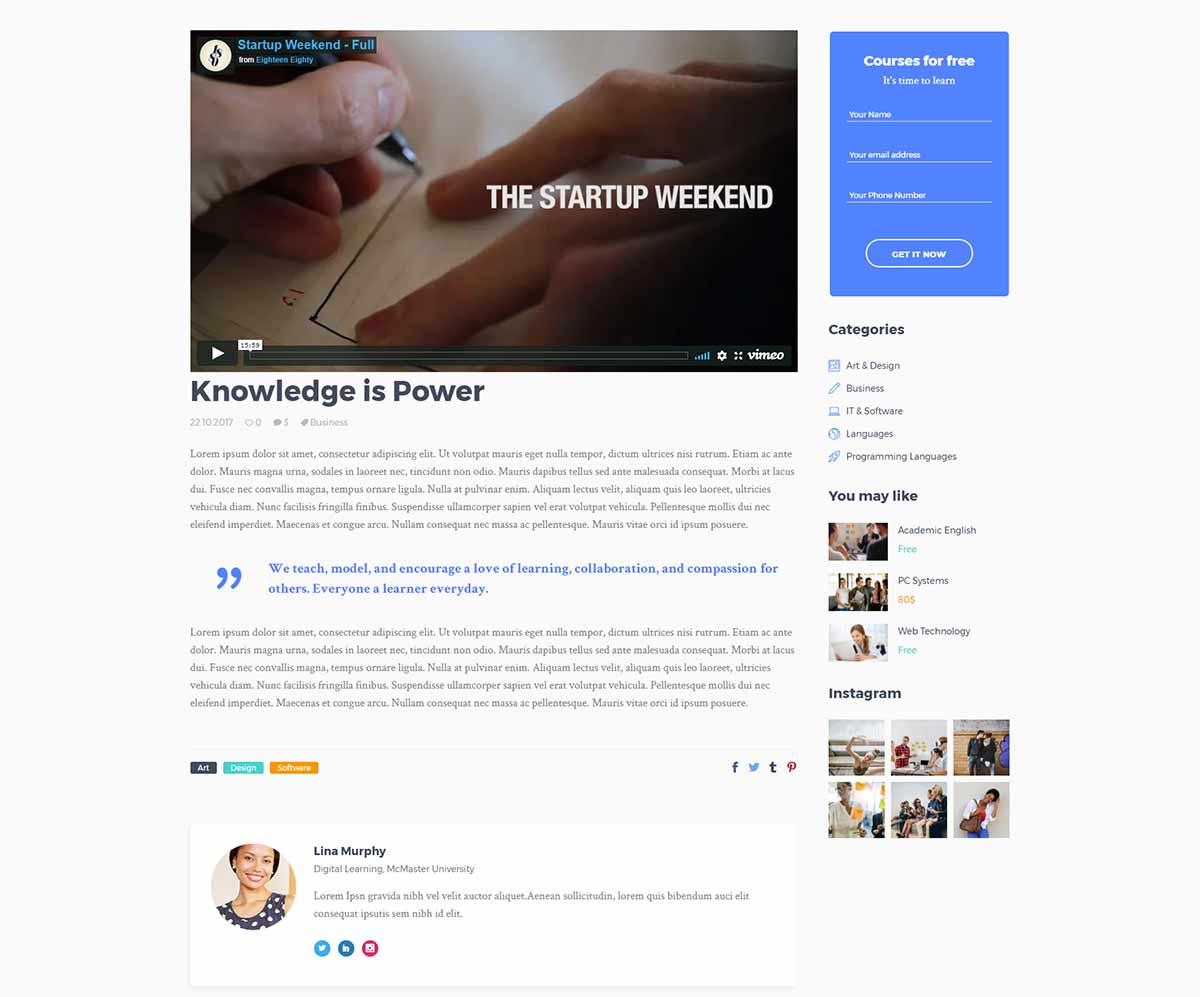
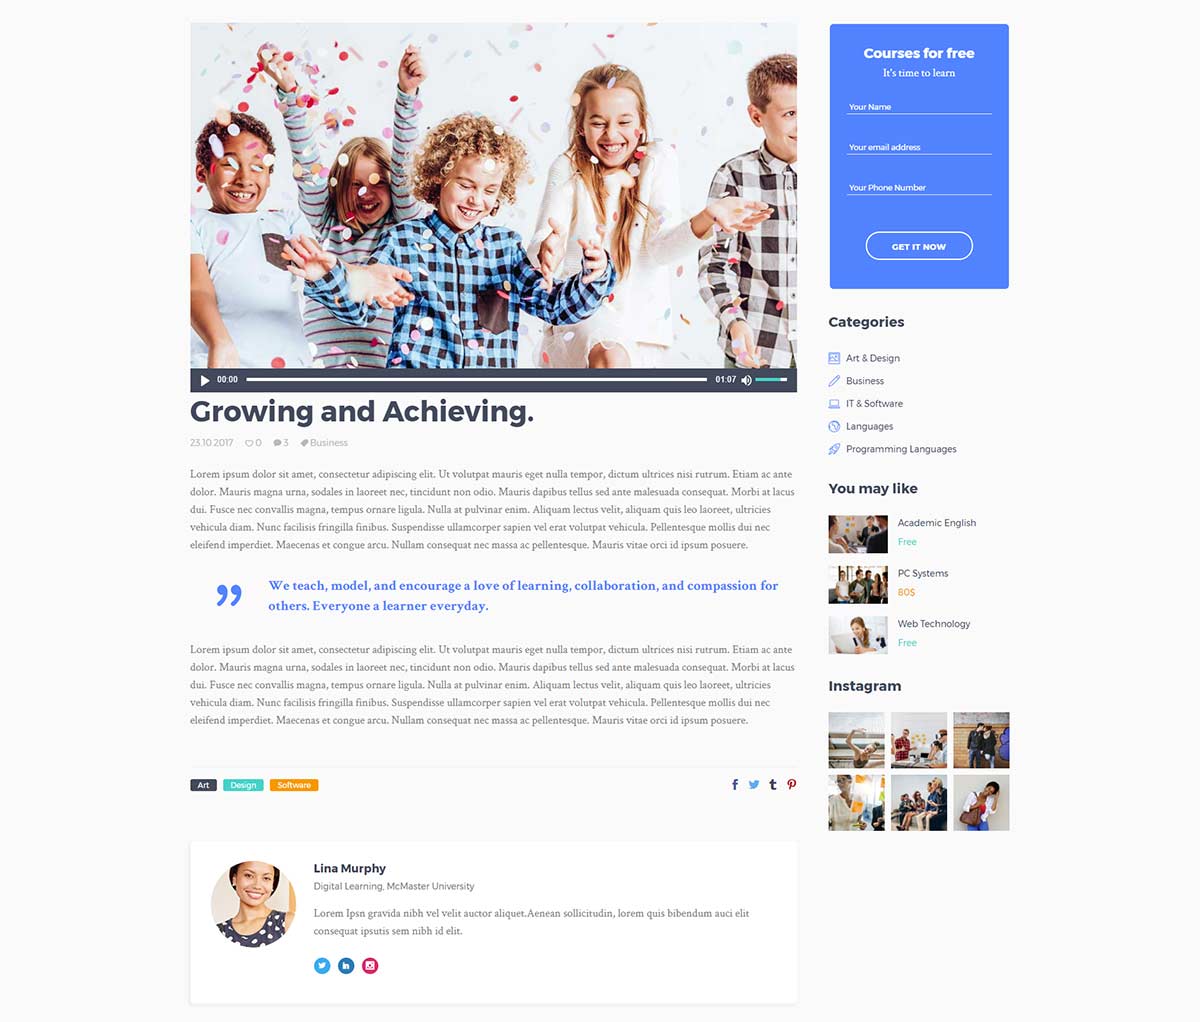
- Video - a field named Elated Video post format will appear in the bottom section of the page. Here you can enter your video links. You can link videos from YouTube or Vimeo, or alternatively, host your own videos. If you decide to self-host your video files, you need to upload the video files via the Media section, and then enter the path to your video files in the corresponding fields. We recommend uploading videos in MP4 format in order to ensure compatibility with all modern browsers.
- Audio - a field named Elated Audio post format will appear in the bottom section of the page. Here you can enter the path to an audio file you have previously uploaded to the Media Library, or a link to an online audio service, depending on what you choose in the "Audio Type" field.
Now it's time to categorize this post:
- Beneath the Format section you will see a section named Categories. Here you can select the categories that you would like to add this post to. If you would like to create a new category, click on the + Add New Category link. A text field will appear in which you can enter a category name, and then click Add New Category.
- Once you've selected the categories you would like to add your post to, click the Publish button. Congratulations, you've just published your first blog post!
- Beneath the Categories section you will see the Tags and Featured Image sections. Here you can add tags to your post, and set a featured image which will be displayed for this post on blog list pages.
Now that we have published our first blog post, let’s go over the available custom fields for blog posts.
Elated General
- Always Put Content Behind Header - Set this option to "Yes" if you would like the header to cover the top of the page content.
- Content Style - Define styles for the page content.
- Slider Shortcode - If you wish to have a slider on the top of your page, copy and paste the slider shortcode here.
- Page Background Color - Set a background color for this page.
- Boxed Layout - Set this option to "Yes" to enable the boxed layout. If you choose a boxed layout for this page, the content will be fitted in a centrally positioned grid.
- Page Background Color - Set a background color for outside the boxed content.
- Background Image - Set a background image for the content outside the box.
- Background Pattern - Set a background pattern for the content outside the box.
- Background Image Attachment - Choose whether the background image will be fixed or can be scrolled.
- Passepartout - Set this option to "Yes" if you would like to display a passepartout border around this page.
- Passepartout Color - Set a color for the passepartout.
- Passepartout Size - Set a size for the passepartout.
- Responsive Passepartout Size - Set a size for the passepartout border when viewed on smaller screens.
- Disable Top Passepartout - Set this option to "Yes" if you would like to disable the top passepartout border.
- Initial Width of Content - Set a width for the grid on this page.
- Smooth Page Transitions - Set this option to "Yes" if you would like to enable smooth loading transitions on this page.
- Enable Preloading Animations - Set this option to "Yes" to enable an animation while the page is loading.
- Page Loader Background Color - Set a background color for the page while it is loading.
- Loader Style - Choose a type of loader and a color for it.
- Enable Fade Out Animation - Set this option to "Yes" to enable a fade out animation when navigating away from this page.
- Enable Preloading Animations - Set this option to "Yes" to enable an animation while the page is loading.
- Show Comments - Set this option to "Yes" to display comments on this page.
Elated Post
- Sidebar Layout - Choose a layout for the sidebar on this post.
- Blog List Image - If you would like to show a different image from the featured image in your blog lists for this post, you can upload that image here.
- Dimensions for Fixed Proportion - Choose a dimension for the featured image when it is displayed in the "Masonry" type of blog list and you have set the "Featured Image Proportion" option in Elated Options > Blog set to "Fixed".
- Dimensions for Original Proportion - Here you can choose to double the width of your blog post featured image when you have set the "Featured Image Proportion" option in Elated Options > Blog to "Original".
- Disable Post Featured Image - Set this option to "Yes" if you would like to disable the featured image for this post.
- Show Title Area - Set this option to "Yes" if you would like to display the title area on this post.
Elated Logo
- Logo Image - Default - Upload a default logo to display in the header on this page.
- Logo Image - Dark - Upload a dark style logo to display in the header on this page.
- Logo Image - Light - Upload a light style logo to display in the header on this page.
- Logo Image - Sticky - Upload a logo to display in the sticky header on this page.
- Logo Image - Mobile - Upload a logo to display in the mobile header on this page.
Elated Header
- Choose Header Type - Choose a header type to use on this page. Depending on the header type you choose, different options will be available.
- Header Skin - Here you can choose a header style to be applied to the header on this page. The "Light" header style displays white navigation text and the "Light" logo version, while the "Dark" header style displays black navigation text and the "Dark" logo version. If you wish to use the default colors and logo, leave this field empty.
- Choose Header Behavior - Choose a behavior for the header on this page.
Top Area
- Header Top Bar - Set this option to "Yes" to display the header top bar.
- Top Bar in Grid - Set this option to "Yes" if you would like to place the top bar content in grid.
- Top Bar Background Color - Set a background color for the header top bar.
- Top Bar Background Color Transparency - Set a transparency (0-1) for the top bar background.
- Top Bar Border - Set this option to "Yes" to display a bottom border on the header top bar.
- Border Color - Set a color for the border.
Logo Area Style
- Disable Header Logo Area Widget - Set this option to "Yes" to hide the Logo Area widget area.
- Logo Area in Grid - Set this option to "Yes" to place the logo area content in grid.
- Background Color - Set a background color for the logo area.
- Transparency - Set a transparency (0-1) for the logo area background
- Logo Area Border - Set this option to "Yes" to display a bottom border on the logo area.
- Border Color - Set a color for the border area.
- Logo Padding - Set padding values for the logo area.
Menu Area Style
- Disable Header Menu Area Widget - Set this option to "Yes" to hide the Menu Area widget area.
- Menu Area in Grid - Set this option to "Yes" to place the menu area content in grid.
- Background Color - Set a background color for the menu area.
- Transparency - Set a transparency (0-1) for the menu area background.
- Menu Area Shadow - Set this option to "Yes" to enable a shadow effect on the menu area.
- Menu Area Border - Set this option to "Yes" to display a bottom border on the menu area.
- Border Color - Set a color for the border area.
- Dropdown Position - Set a position for the dropdown menu. Input the value in percentages (where 100% is the full height of the header).
Vertical Area Style
- Background Color - Set a background color for the vertical header
- Background Image - Upload a background image for the vertical header.
- Disable Background Image - Set this option to "Yes" to hide the background image from the vertical header on this page.
- Shadow - Set this option to "Yes" to enable a shadow effect on the vertical header.
- Vertical Area Border - Set this option to "Yes" to enable a border on the vertical header.
- Border Color - Set a color for the border.
- Center Content - Set this option to "Yes" to vertically center the content in the vertical header.
Elated Title
- Show Title Area - Use this option to control whether you would like to display the title area or not on your website.
- Title Area Type - Chose a type of title area to use.
- Title Area in Grid - Set this option to "Yes" if you would like to set the title area content in grid.
- Height - Set a height for the title area.
- Background Color - Set a background color for the title area
- Background Image - Chose a background image for the title area.
- Background Image Behavior - Choose how you would like the background image to behave.
- Vertical Alignment - Define the vertical alignment setting for the title area content on this page. You can choose to vertically align the title area content from the bottom of the header, or from the top of your browser window.
- Custom Title Text - Input a custom title.
- Title Tag - Choose a heading tag for the title.
- Title Color - Choose a color for the title.
- Subtitle Text - Enter subtitile text to be displayed in the page title area.
- Subtitle Color - Set a color for the subtitle.
- Subtitle Side Padding - Input padding values for the subtitle.
- Breadcrumbs Color - Set a color for the breadcrumbs text.
Elated Footer
- Disable Footer for this Page - Set this option to "Yes" to disable the footer on this page.
- Show Footer Top - Set this option to "Yes" to enable the footer top area on this page.
- Show Footer Bottom - Set this option to "Yes" to enable the footer bottom area on this page.
Blog Lists
After you have created enough posts, you need to also create a blog list on which all of these posts will be displayed. To create a blog list, you first need to create a new page on which your blog list will be displayed, and in the page's backend find the Templates dropdown on the right side of the screen. Then simply choose from one of the following options:
- Blog: Masonry

- Blog: Standard
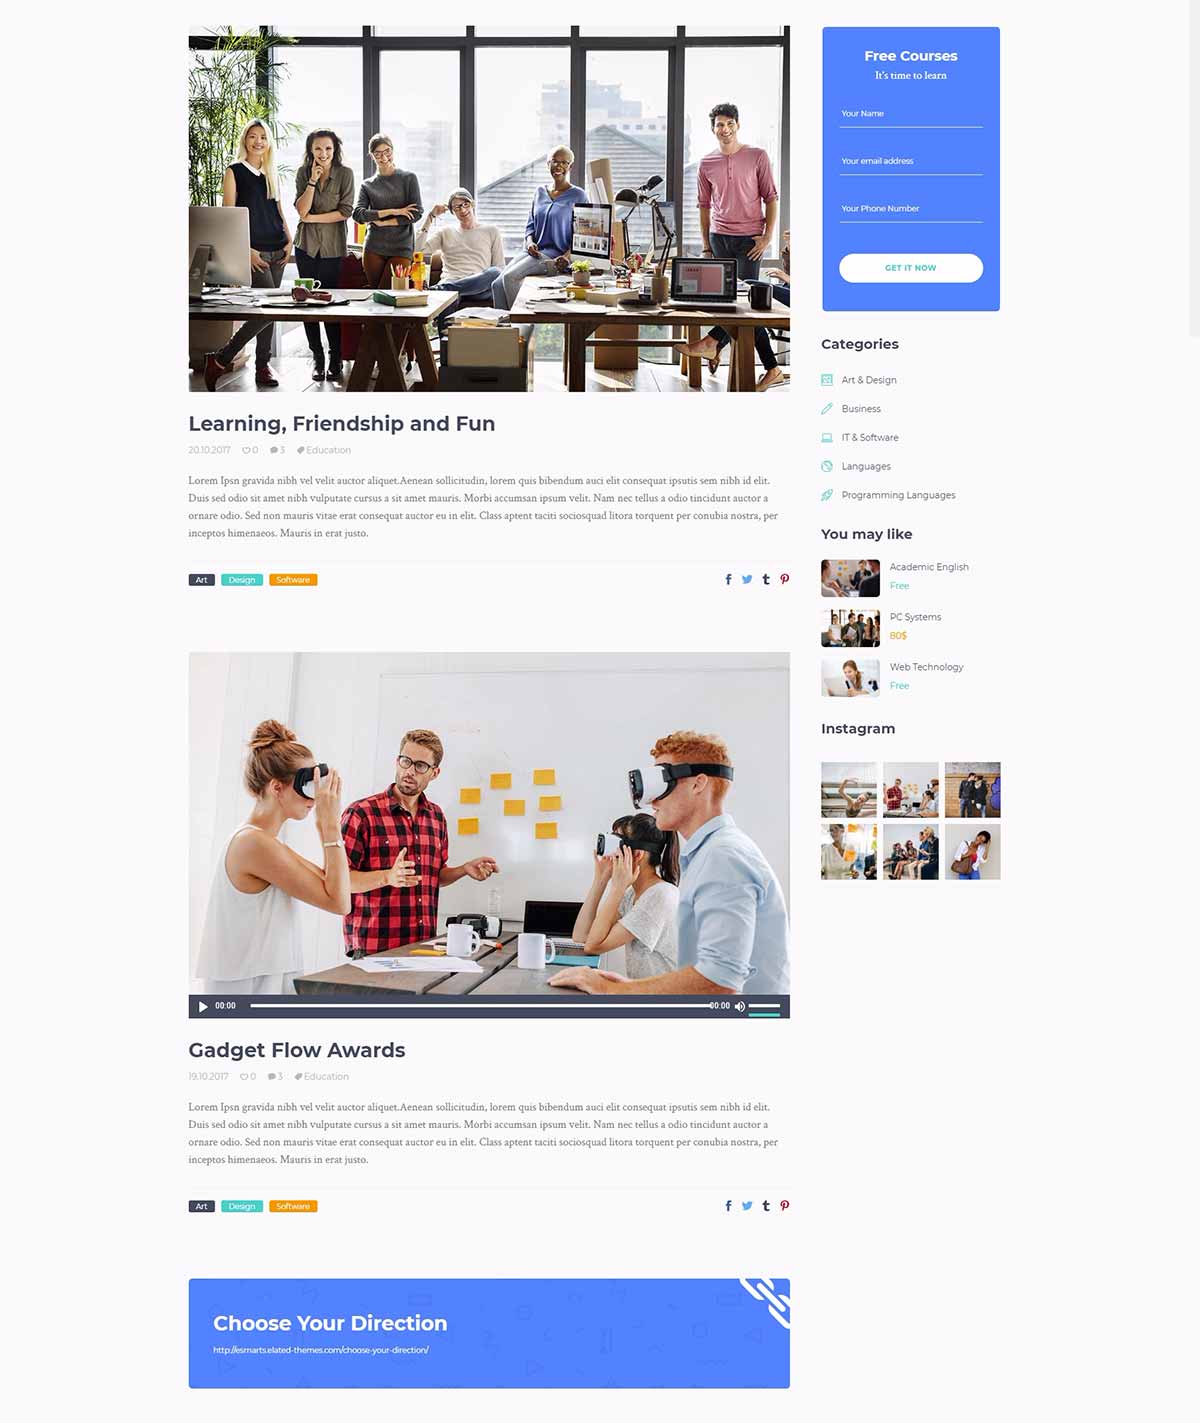
By choosing one of the blog templates you will have set this page to automatically show a list of your blog posts. All you need to do now is publish the page.
Date Format
If you wish to change the date format on blog posts, navigate to Settings > General > Date Format from your WordPress admin, and select your format of choice.
5. Menus
In this section of the User Guide we will discuss menus and menu creation, as well as the creation of anchor links for One Page site functionality.
Menu Creation
To create a menu, navigate to Appearance > Menus from your WordPress admin panel.
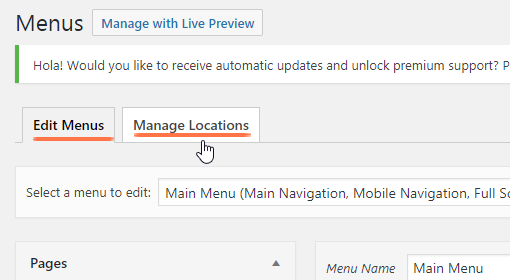
In the upper left corner of your screen you will see two tabs: Edit Menus and Manage Locations.
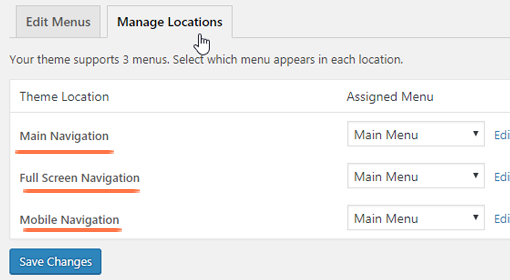
In the Manage Locations tab you can assign menus to several different locations: Main Navigation, Fullscreen Navigation, and Mobile Navigation, depending on which header type you are using.
You can also assign the current menu to a location in the Edit Menus tab, by scrolling down to the Menu Settings section.

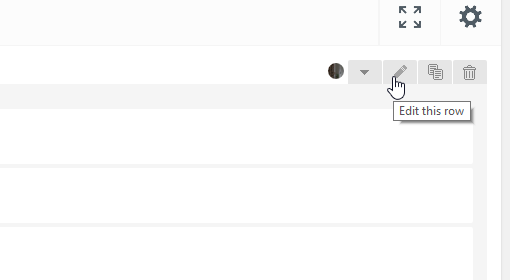
You can edit your menus in the Edit Menus tab. When editing menus, you can click on the small triangle icon on each menu item to open a list of editable settings:
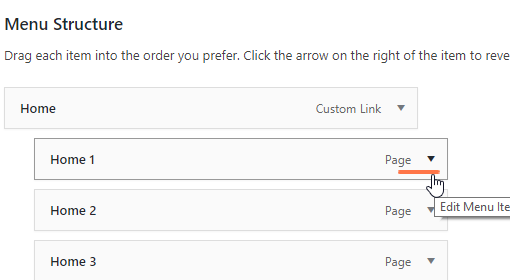
- Navigation Label – You can enter a navigation label for this menu item. This is the text that will appear on your menu. By default, the navigation label is set to the title of the page.
- Title Attribute – The title attribute will appear when a user hovers over the navigation label.
- Anchor – If you would like the menu item to lead viewers to a certain section on the page it links to, you can enter the section’s anchor ID in this field.
- Don’t Link – Enable this option if you don’t want the menu item to be a clickable link.
- Don’t Show – Enable this option if you want to hide this menu item from your menu. This is useful when creating a wide menu in which you need to set a 2nd level menu item to hold your 3rd level menu items, but you don’t want the 2nd level menu item to be displayed in the menu.
- Type – You can choose between 3 menu types. If you leave this field empty, a regular dropdown menu will be displayed. The other two available options are "Wide" menu, and "Wide with icons" menu. Note that you only need to set this option for the parent menu item, and all the child items will inherit the setting you set for their parent item.
- Wide Menu Position – Set an alignment for your wide menu. This option is useful if you don't have many columns and would like to set a certain position for them.
- Icon Pack - Choose the icon pack you would like to use for your menu icons. Icons are displayed in the default and "wide with icons" menu types, but not in the "wide" menu type.
- Icon – You can use this field to set an icon to appear next to this menu item.
Wide Menu
- Custom Widget Area – You can choose a custom widget area to appear beneath the menu item. This only applies to wide menus, and is recommended for 3rd level menu items.
Anchor Links (One Page Site Functionality)
You can link menu items to sections on your page using anchor links. This way, when clicked, the menu item will scroll the page down to the section you linked it to.
In order to create an anchor link, you need to follow these steps:
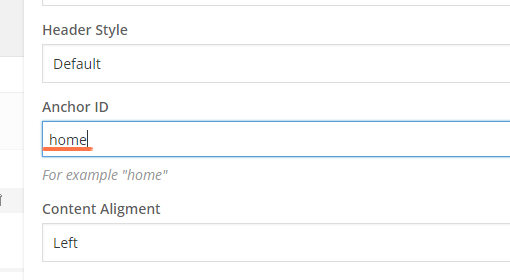
- You need to set anchor IDs for your rows when editing your page. You can achieve this by editing the row element in Visual Composer. In the Anchor ID field of the of the row item’s options, type in the name of your anchor. You can use any text without empty spaces.
- You can repeat step 1 for as many rows on as many pages as needed.
- When you go to edit your menu in Appearance > Menus, find the page (or pages) containing your rows with anchors and drag as many instances of them into your menu as needed.
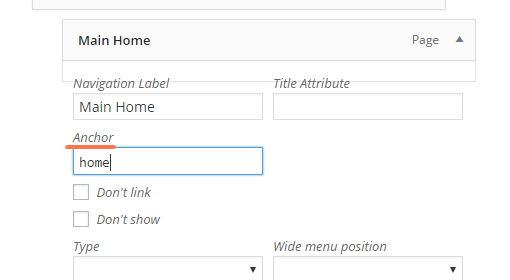
- Edit each of the newly added menu items, and for each one type in its corresponding anchor ID in the Anchor field.
6. Elated Options
This section of the User Guide provides a comprehenisve overview of all the settings available in the Elated Options section of your WordPress admin panel. The settings found here are applied globally and will affect all pages on your website. However, note that many of these options can be overridden locally by applying settings on individual pages or on shortcode elements.
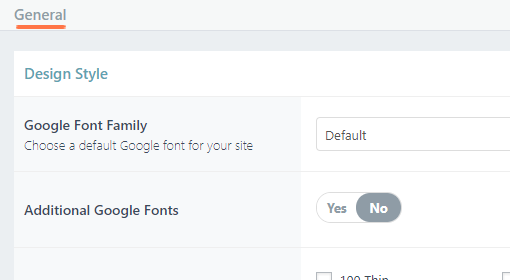
General
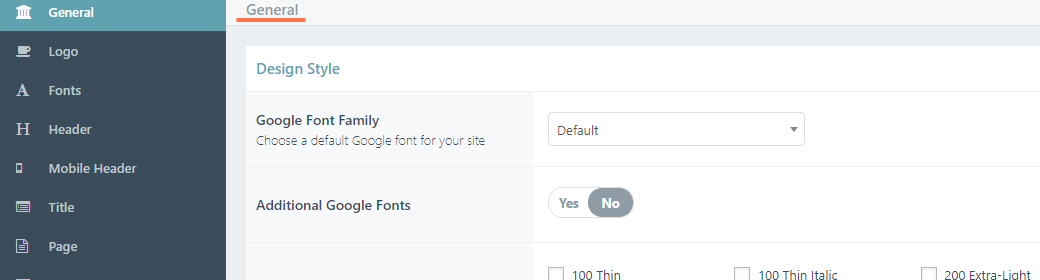
Design Style
- Google Font Family - Set the default font family for your website.
- Additional Google Fonts - Set this option to "Yes" if you would like to add aditional Google Fonts to your website. These fonts are not set on any specific elements, just added to the site stylesheet, so they can be added to elements via custom css, or used in the Custom Font element.
- Google Fonts Style & Weight - Define font weights for your Google Fonts.
- Google Fonts Subset - Choose a subset of fonts to use.
- First Main Color - Set a first main color for your website.
- Page Background Color - Set a background color for your pages.
- Text Selection Color - Set a color for text selection.
- Boxed Layout - Set this option to "Yes" to enable the boxed layout. If you choose a boxed layout for your site, the content will be fitted in a centrally positioned grid.
- Page Background Color - Set a background color for outside the boxed content.
- Background Image - Set a background image for the content outside the box.
- Background Pattern - Set a background pattern for the content outside the box.
- Background Image Attachment - Choose whether the background image will be fixed or can be scrolled.
- Passepartout - Set this option to "Yes" if you would like to enable a passepartout border around your website.
- Passepartout Color - Choose a color for the passepartout border.
- Passepartout Size - Set a size (in pixels) for the passepartout border.
- Responsive Passepartout Size - Set a size for the passepartout border when viewed on smaller screens.
- Disable Top Passepartout - Set this option to "Yes" if you would like to disable the top passepartout border.
- Initial Width of Content - Choose the initial width of your content in grid. This option only takes effect on pages set to the "Default Template" and rows set to "In Grid".
Settings
- Smooth Scroll - Set this option to "Yes" if you would like to enable a smooth scrolling effect.
- Smooth Page Transitions - Set this option to "Yes" if you would like to enable smooth loading transitions between pages on your website.
- Enable Preloading Animations - Set this option to "Yes" to enable an animation while the page is loading.
- Page Loader Background Color - Set a background color for the page while it is loading.
- Loader Style - Choose a type of loader and a color for it.
- Enable Fade Out Animation - Set this option to "Yes" to enable a fade out animation when navigating away from pages on your website.
- Enable Preloading Animations - Set this option to "Yes" to enable an animation while the page is loading.
- Show "Back to Top" Button - Set this option to "Yes" to display a "Back to Top" button on your website.
- Responsiveness - Set this option to "Yes" to enable responsiveness on your website.
Custom Code
- Custom CSS - You can input any custom CSS into this field and it will take effect on your site.
- Custom JS - You can input any custom Javascript into this field and it will take effect on your site. The entered code will be executed on domready. If using jQuery, please note that the jQuery selector is "$j" because of the conflict mode.
Google API
- Google Maps API Key - Insert your Google Maps API key here. You can find instructions on how to create a Google Maps API key here.
Logo
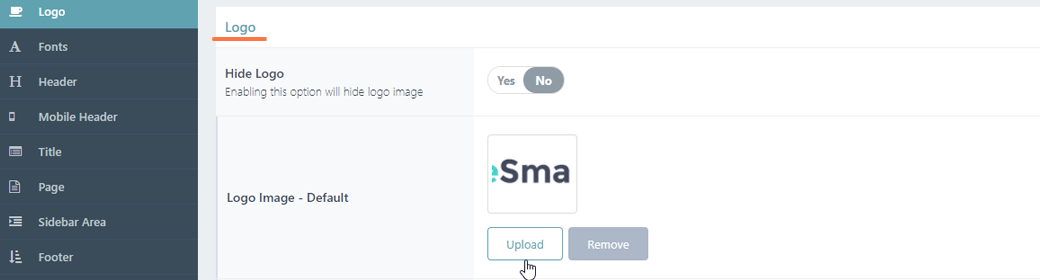
- Hide Logo - Set this option to "Yes" to hide the logo from your website.
- Logo Image - Default - Upload a default logo for your website.
- Logo Image - Dark - Upload a logo to be displayed on the "Dark" header skin.
- Logo Image - Light - Upload a logo to be displayed on the "Light" header skin.
- Logo Image - Sticky - Upload a logo to be displayed on the sticky header.
- Logo Image - Mobile - Upload a logo to be displayed on the mobile header.
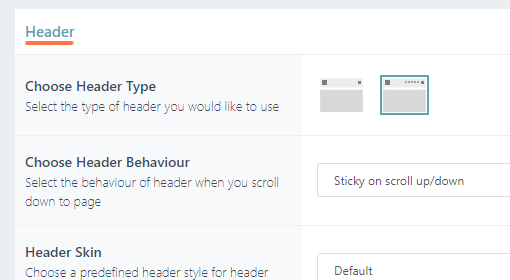
Header
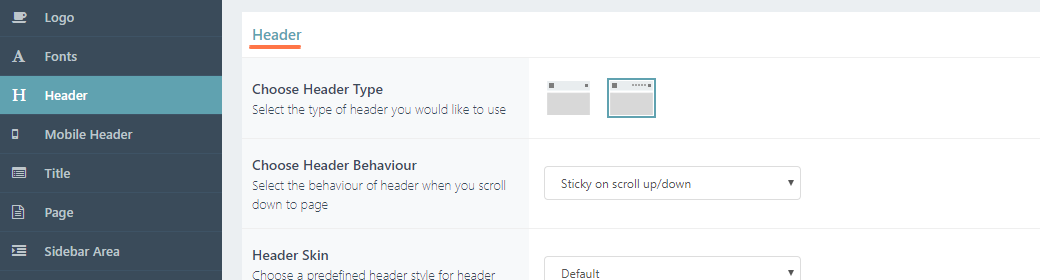
Header
- Choose Header Type - Choose the type of header you would like to use.
- Choose Header Behaviour - Choose a header behaviour type.
- Header Skin - Choose a predefined header skin in order to display all header elements in the style of that skin.
- Top Bar - Set this option to "Yes" to enable the top bar on the header.
- Choose Top Bar Layout - Set a layout for the top bar.
- Choose Columns Width - Set the width of the top bar columns..
- Enable Grid Layout - Set this option to "Yes" if you would like the top bar content to be displayed in grid.
- Background Color - Set a background color for the top bar.
- Background Transparency - Set a background transparency for the top bar.
- Top Bar Height - Set a height for the top bar.
- Choose Top Bar Layout - Set a layout for the top bar.
Depending on the type of header you choose, you will be presented with a specific set of options.
Menu Area Style
- Menu Area in Grid - Set this option to "Yes" if you would like to place the menu area in grid.
- Background Color - Set a background color for the menu area.
- Background Transparency - Set a background transparency (from 0-1) for the menu area.
- Menu Area Shadow - Set this option to "Yes" to enable a shadow effect on the menu area.
- Menu Area Border - Set this option to "Yes" to display a border below the menu area.
- Border Color - Set a color for the menu area border.
- Height - Set a height for the header.
- Choose Menu Area Position - Choose a position for the menu area.
Fullscreen Menu
- Fullscreen Menu Overlay Animation - Choose an animation type for the fullscreen menu overlay.
- Fullscreen Menu in Grid - Set this option to "Yes" to set the fullscreen menu in grid.
- Fullscreen Menu Alignment - Choose a text alignment for the fullscreen menu.
- Background - Set a background color and background color transparency for the fullscreen menu.
- Background Image - Set a background image for the fullscreen menu.
- Pattern Background Image - Set a pattern background image for the fullscreen menu.
- 1st Level Style - Set text styles for the 1st level menu items.
- 2nd Level Style - Set text styles for the 2nd level menu items.
- 3rd Level Style - Set text styles for the 3rd level menu items.
- Full Screen Menu Icon Style - Set styles for the fullscreen menu icon.
Sticky Header
- Scroll Amount for Sticky - Enter a scroll amount (how much you will scroll from the top of the page) for the sticky header to appear at.
- Sticky Header in Grid - Set this option to "Yes" to set the sticky header in grid.
- Background Color - Set a background color for the sticky header.
- Background Transparency - Set a backgorund transparency for the sticky header.
- Border Color - Set a color for the sticky header border.
- Sticky Header Height - Set a height for the sticky header.
- Sticky Header Menu - Set styles for the sticky header menu.
Fixed Header
- Background Color - Set a background color for the fixed header.
- Background Transparency - Set a background transparency for the fixed header.
- Border Color - Set a color for the border of the fixed header.
- Fixed Header Menu - Define style for the menu area in the fixed header.
Main Menu
Main Menu General Settings
- Main Dropdown Menu - Set styles for the dropdowns in the main menu.
- Main Dropdown Menu Appearance - Choose how the dropdown menu will appear.
- Dropdown Position - You can use this field if you would like to change the position of the second menu level dropdown. Enter the value in percentages, in relation to the entire header height. So if you would like your dropdown to appear in the middle of your header instead of fully below it, you would enter 50. The default setting is 100 (dropdown appears right below header).
- 1st Level Menu - Set styles for 1st level menu items in the main menu.
- 2nd Level Menu - Set styles for 2nd level menu items in the main menu.
- 2nd Level Wide Menu - Set styles for the 2nd level menu items in the wide menu.
- 3rd Level Menu - Set styles for 3rd level menu items in the main menu.
- 3rd Level Wide Menu - Set styles for 3rd level menu items in the wide menu.
Mobile Header
- Mobile Header Styles - Define the style of the mobile header.
- Mobile Menu Styles - Define the style of the mobile menu.
- Logo Height for Mobile Header - Set a height for the logo in the mobile header (on screens smaller than 1000px).
- Logo Height for Mobile Devices - Set a height for the logo on mobile devices (on screens smaller than 480px)
Typography
- 1st Level Menu - Set typography styles for the 1st level menu items in the mobile menu.
- Dropdown Menu - Set typography styles for the 2nd and 3rd level menu items in the mobile menu.
Mobile Menu Opener
- Mobile Navigation Title - Input a title for the mobile menu.
- Mobile Navigation Icon Color - Set a color for the mobile menu icon.
- Mobile Navigation Icon Hover Color - Set a color for the mobile menu icon on hover.
Title
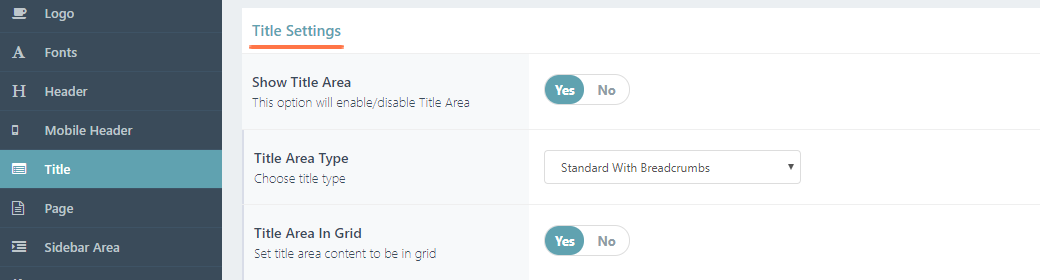
Title Settings
- Show Title Area - Use this option to control whether you would like to display the title area or not on your website.
- Title Area Type - Chose a type of title area to use.
- Title Area in Grid - Set this option to "Yes" if you would like to set the title area content in grid.
- Height - Set a height for the title area.
- Background Color - Set a background color for the title area
- Background Image - Chose a background image for the title area.
- Background Image Behavior - Choose how you would like the background image to behave.
- Vertical Alignment - Define the vertical alignment setting for the title area content on this page. You can choose to vertically align the title area content from the bottom of the header, or from the top of your browser window.
Typography
Title
- Title - Set styles for the title text.
Subtitle
- Subtitle - Set styles for the subtitle text in the title area.
Breadcrumbs
- Breadcrumbs - Set styles for the breadcrumb text in the title area.
Page
Page Style
- Show Comments - Set this option to "Yes" to display comments on pages.
Content Style
- Content Top Padding For Template in Full Width - Set a top padding for the page content when using full width templates.
- Content Top Padding For Templates in Grid - Set a top padding for page content when using in grid templates.
- Content Top Padding For Mobile Header - Set a top padding for page content when the header layout switches to the mobile header (under 1024px).
Sidebar
- Sidebar Layout - Choose a layout for the sidebar on pages.
Search
Search Page
- Layout - Choose a layout for search pages.
- Sidebar Layout - Choose a layout for the sidebar on search pages.
Search
- Select Search Type - Choose a type of search to use.
- Search Icon Pack - Choose an icon pack to use ofr search icons.
- Enable Grid Layout - Set this option to "Yes" if you would like the search area to be in grid.
Initial Search Icon in Header
- Icon Size - Set a size for the search icon in the header.
- Icon Colors - Set colors for the search icon.
- Enable Search Icon Text - Set this option to "Yes" to display the text "Search" next to the search icon in the header.
- Search Icon Text - Set styles for the search icon text.
Side Area
- Side Area Icon Style - Define styles for the side area icon.
- Side Area Width - Set a width for the side area.
- Background Color - Set a background color for the side area.
- Padding - Define padding for the side area.
- Text Alignment - Choose an alignment for the text in the side area.
Footer
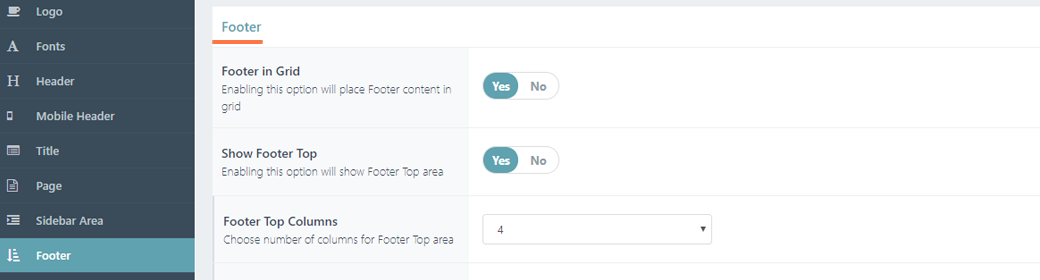
- Footer in Grid - Set this option to "Yes" if you would like the footer content to be displayed in grid.
- Show Footer Top - Set this option to "Yes" to display the footer top.
- Footer Top Columns - Choose a number of columns to display in the footer top.
- Footer Top Columns Alignment - Choose the text alignment for the footer top column content.
- Background Color - Set a background color for the footer top.
- Show Footer Bottom - Set this option to "Yes" to display the footer bottom.
- Footer Bottom Columns - Choose the number of columns to display in the footer bottom.
- Background Color - Set a background color for the footer bottom.
Fonts
Headings
Here you can set up all styles for heading tags (H1-H6)
Headings Responsive
Here you can set up responsive styles for headings (H1-H6), when viewed on tablet and mobile devices.
Text
- Paragraph - Set styles for paragraph text.
- Paragraph Responsive (Tablet Portrait View) - Set styles for paragraph text when viewed on a tablet in portrait view.
- Paragraph Responsive (Mobile Devices) - Set styles for paragraph text when viewed on mobile devices.
- Links - Set styles for link text.
Blog
Blog Lists
- Blog Layout for Archive Pages - Choose a blog layout for blog archive pages.
- Sidebar Layouts for Archive Pages - Choose a sidebar layout for blog archive pages.
- Masonry - Layout - Choose whether you would like your Masonry blog lists to be in grid or full width.
- Masonry - Number of Columns - Choose a number of columns to display Masonry blog lists in.
- Masonry - Space Between Items - Choose a predefined spacing between items in Masonry blog lists.
- Featured Image Proportion - Choose whether you would like your featured images to keep their original proportions or have a fixed proportion which you can predefine for each blog post individually (by navigating to that blog post from the backend and choosing your fixed proportion in the "Dimensions for Fixed Proportion" field).
- Pagination Type - Choose a type of pagination to use.
- Number of Words in Excerpt - Set a number of words to be displayed in the excerpt.
Blog Single
- Blog Layout for Single Post Pages - Choose a default layout for your single blog post pages.
- Sidebar Layout - Choose a sidebar layout for blog single posts.
- Show Title Area - Set this option to "Yes" if you would like to display the title area on your blog single posts.
- Full Height Title - Set this option to "Yes" if you would like the title area to take up the full height of the screen.
- Show Post Title in Title Area - Set this option to "Yes" to display the post title in single post title areas.
- Show Related Posts - Set this option to "Yes" to display related posts on blog single pages.
- Show Comments Form - Set this option to "Yes" to display the comments form.
- Enable Prev/Next Single Post Navigation Links - Enable navigation links on single posts, so you can navigate through single blog posts.
- Enable Navigation Only in Current Category - Set this option to "Yes" to limit the navigation only to the current category.
- Show Author Info Box - Set this option to "Yes" to display the author info box on blog single posts.
- Show Author Email - Set this option to "Yes" to show the author e-mail in the author info box.
- Show Author Social Icons - Set this option to "Yes" to display social icons in the author info box.
Course
Course Archive
- Number of Items - Set a number of items you would like to display on course archive pages.
- Number of Columns - Choose a number of columns to display your courses in.
- Space Between Items - Set a spacing between course items on archive pages.
- Image Proportions - Choose proportions for your images on course archive pages.
Course Single
- Show Title Area - Set this option to "Yes" if you would like to display the title area on course single pages.
- Show Comments - Set this option to "Yes" if you would like to display comments on course single pages.
- Course Single Slug - If you would like to use a different Single Course slug, input that slug here. (Note: After entering the slug, navigate to Settings -> Permalinks and click "Save" in order for changes to take effect)
Social Networks
- Enable Social Share - Set this option to "Yes" to enable the social share functionality.
Show Social Share On
Here you can choose on what types of pages you would like to enable the social share functionality.
Social Networks
Here you can set which social networks you would like sharing to be available on. If you would like to, you can also set a custom icon for each social network.
- Connect With Twitter - Use this button to connect the twitter widget with your twitter feed. See more in the Widgets section of this User Guide.
- Connect With Instagram - Use this button to connect the twitter widget with your instagram feed. See more in the Widgets section of this User Guide.
Open Graph
- Enable Open Graph - Set this option to "Yes" if you would like to enable the usage of the open graph protocol on your website. The open graph protocol is created for easier and more streamlined sharing of pages on social networks. To find out more about the open graph protocol, please visit the following link: http://ogp.me/
- Default Share Image - Upload an image to use as your default share image. This image will be used only if you are sharing a page that doesn't have a featured image set. Please make sure that the image is at least 1200 x 630 px large, and up to maximum 8MB in size.
Enable Social Login
- Enable Social Login - Set this option to "Yes" if you would like to enable loging in via Facebook and Google accounts. If you set this option to "Yes", two new fields will appear for enabling Facebook and Google. In order to enable logging in via these networks, you need to create apps for each of the networks and input the App ID and Client ID in the designated fields (which will appear after you enable each of the networks). To learn how to create a Facebook app and find you App ID, please view this link. To learn how to create a Google app and find your Client ID, please view this link.
404 Error Page
Header
- Logo Image - Upload a logo image for the 404 error page.
- Background Color - Set a background color for the header on your 404 page.
- Background Transparency - Set a transparency value (from 0 to 1) for the header on your 404 page.
- Border Color - If you would like the header on your 404 page to have a border, set the border color here.
- Header Skin - Choose a skin for the header on your 404 page.
404 Page Options
- Background Color - Set a background color for the 404 page.
- Background Image - Upload a background image for the 404 page.
- Pattern Background Image - If you would like to use a pattern as the background, you can upload the pattern image here.
- Title Image - Upload a background image for the title area of your 404 page.
- Title - Enter a title to be displayed on the 404 error page.
- Title Style - Set styles for the 404 page title.
- Back to Home Label - Enter text for the "Back to Home" label. This is the text that will suggest users to return to the home page from the 404 error page.
- Button Skin - Choose a predefined skin for the "Back to Home" button.
Contact Form 7
You can set multiple custom styles for contact forms, and then choose what style you would like to apply to each form you add to a page.
- Form Text Typography - Set styles for the contact form text.
- Form Label Typography - Set styles for the contact form labels.
- Form Elements Background and Border - Set the background and border styles for contact form elements.
- Elements Padding - Set up padding for contact form elements.
- Elements Margin - Set up margins for contact form elements.
- Textarea Height - Set a height for the textarea contact form elements.
- Button Typography - Set styles for text in the contact form buttons.
- Button Background and Border - Set the background and border styles for contact form buttons.
- Button Height - Set a height for the contact form button.
- Button Left/Right Padding - Set a left and right padding for the contact form button.
WooCommerce
Product List
- Product List Columns - Choose a number of columns for the product list.
- Space Between Products - Set a spacing between products in the list.
- Product Info Position - Choose a position for the product information.
- Number of Products Per Page - Set the number of products you would like to display per page.
- Products Title Tag - Set a heading tag for your product titles on product list pages.
Single Product
- Show Title Area - Set this option to "Yes" if you would like to display the title area on single product pages.
- Single Product Title Tag - Set a heading tag for your single product titles.
- Set Thumbnail Images Position - Choose a position for the thumbnail images.
- Enable Zoom Maginfier - Set this option to "Yes" if you would like to enable a zoomed view of product images when they are hovered on.
- Set Image Behavior - Choose a behavior for the images.
Reset
You can use this option to reset all the Elated Options to their default settings.
Backup Options
You can use this panel to export and import your theme options. Please note that if you import theme options, your current options will be rewriten.
- Export - Copy the code from this field and save it to a textual file to export your options. Save that textual file somewhere so you can later use it to import options if necessary.
- Import - To import options, just paste the code you previously saved from the "Export" field into this field, and then click the "Import" button.
Import
You can use this options panel to import demo content. For more information about importing demo content please refer to the Getting Started section of this User Guide.
7. Custom Shortcodes
In this section of the User Guide we will take a comprehesive look at all the custom shortcodes included in the theme and their repsective options.

Row
The row element is a container element in which you can add other elements (shortcodes) and sort them on your page. Besides the standard Visual Composer options for rows, you also have the following custom options:
Elated Settings
- Elated Row Content Width - Set a width for your row content. You can choose between "Full Width" and "In Grid".
- Elated Anchor ID - Enter an anchor ID for this row. Anchor IDs are used to create anchor links for one page site functionality. You can find out more about creating anchor links in the Menus section of this User Guide.
- Elated Background Color - Set a background color for the row.
- Elated Background Image - Upload a background image for the row.
- Elated Disable Background Image - Optionally, you can choose a responsive breakpoint below which the background image won't be displayed.
- Elated Parallax Background Image - Upload a background image for the parallax row.
- Elated Parallax Speed - Input a speed (in milliseconds) for the parallax effect.
- Elated Parallax Section Height - Input a height for the parallax row.
- Elated Content Alignment - Set an alignment for the content in this row.
Accordion
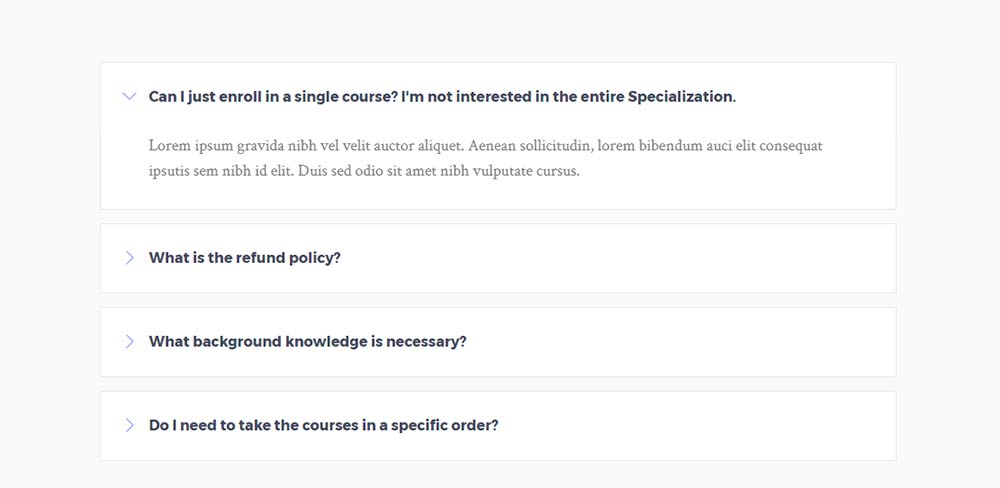
Accordions allow you to organize your content and display only what is necessary at a particular moment.
- Custom CSS Class - If you wish to style a particular content element differently, you can use this field to add an extra class name to that element and then refer to that class name in your css file.
- Style - Choose a style for your accordions.
- Layout - Choose a layout for your accordions.
- Background Skin - Choose a background skin for your accordions. This option is only available when using the "Boxed" type of accordion.
After you have set up the accordion holder, you can add Accordion Tabs and modify the following options:
- Title - Enter a title for the accordion.
- Title Tag - Set a heading tag for the title.
Now you can enter content into your accordion. You can enter any shortcode into the accordion.
Animation Holder
You can use this shortcode to create an entry animation for any element on your page. To do this you first need to add the Animation Holder to your page and set the following options:
- Animation - Choose an entry animation.
- Animation Delay - Enter an animation delay time (in milliseconds).
After you have added the Animation Holder Element, you can add any other shortcode inside it and it will become animated.
Banner
You can use this shortcode to create a banner with a background image, link, title, subtitle, and some text.
- Image - Upload an image for the banner.
- Content Background Color - Set a background color for the banner content.
- Content Custom Icon - Upload an image to use as the banner icon.
- Title - Input a title for the banner.
- Title Tag - Choose a heading tag for the title.
- Text - Input some text.
- Link - If you would like the banner to lead to some other page on click, input the URL you would like it to lead to here.
- Target - Choose whether you would like the link to open in the same browser window or a new browser window.
- Link Text - Input the text you would like to display on the link.
Banner Simple
You can use this shortcode to create a simple banner.
- Background Color - Set a background color for the banner.
- Custom Icon - Upload an image to use as an icon.
- Title - Input a title.
- Title Color - Set a color for the title.
- Link - Input a link for the banner to lead to when clicked on.
- Target - Choose whether you would like the icon to open in the same browser tab or in a new browser tab.
Blog List
This shortcode allows you to display your blog posts on a page.
General
- Type - Choose a type for your blog list.
- Number of Posts - Choose a number of posts to display.
- Number of Columns - Set the number of columns you would like your blog posts to display in.
- Space Between Columns - Choose a predefined space between columns.
- Order By - Choose how you would like to order your blog posts.
- Order - Choose between ascending and descending order.
- Category - If you would like to display only blog posts from a certain category, enter the category slug in this field.
- Image Size - Choose a size for you images.
Post Info
- Title Tag - Choose a heading tag for your blog post titles.
- Title Text Transform - Set a text transform style for the post titles.
- Text Length - Enter the number of characters you would like displayed in the blog post excerpt.
- Enable Post Info Section - Set this option to "Yes" to enable the post info section.
- Enable Post Info Author - Set this option to "Yes" to display the author name in the post info section.
- Enable Post Info Date - Set this option to "Yes" to display the date in the post info section.
- Enable Post Info Category - Set this option to "Yes" to display the post category in the post info section.
- Enable Post Info Comments - Set this option to "Yes" to display the number of comments in the post info section.
- Enable Post Info Like - Set this option to "Yes" to display the number of likes in the post info section.
- Enable Post Info Share - Set this option to "Yes" to display the share icons in the post info section.
Additional Features
-
Pagination Type - Choose a type of pagination to use.
Button
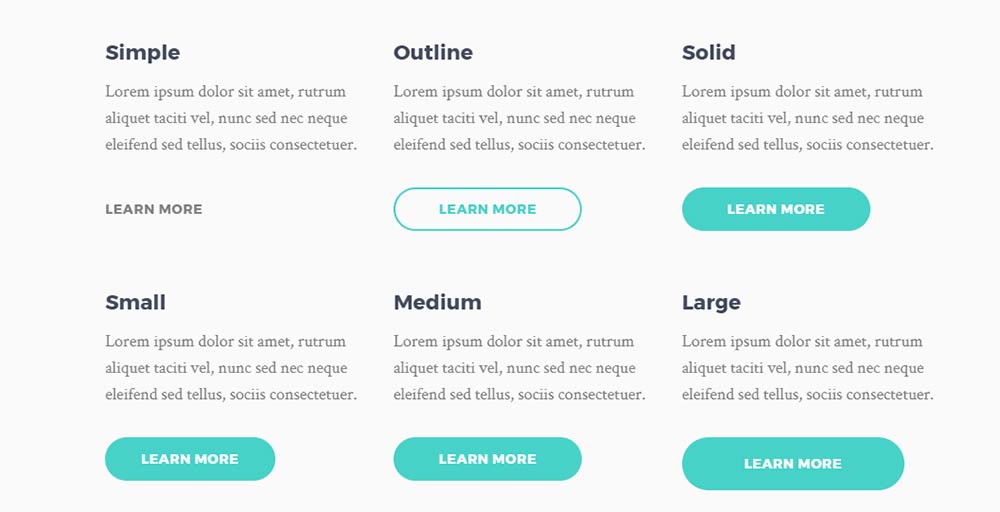
Buttons are a widely used element on the web and can be used for a variety of purposes.
General
- Custom CSS Class - If you wish to style a particular content element differently, you can use this field to add an extra class name to that element and then refer to that class name in your css file.
- Type - Choose a type of button to use.
- Skin - Choose skin for the button.
- Hover Animation - Set this option to "Yes" if you would like to enable a hover animation on the button.
- Size - Choose a predefined size for your button.
- Text - Input text for your button.
- Link - Enter a URL you would like your button to lead to when clicked.
- Link Target - Set a target for your link.
- Icon Pack - Choose an icon pack for your button.
- Icon - Choose an icon for your button.
- Text Transform - Choose a text transform style for the button text.
Design Options
- Color - Set a color for your button text.
- Hover Color - Set a hover color for your button text.
- Background Color - Set a background color.
- Hover Background Color - Set a hover color for your button background.
- Border Color - Set a border color for your button.
- Hover Border Color - Set a hover color for your button border.
- Font Size - Set a font size for the button text.
- Font Weight - Choose a font weight.
- Margin - Set a margin for the button in a top, right, bottom, left format (e.g. "10px 20px 10px 20px").
- Button Padding - Set a padding for the button. Please input the padding in a "top right bottom left" format (e.g. "10px 20px 10px 20px").
Call to Action
Call to Action elements allow you to display bold messages on your page, inviting viewers to follow a link or take some manner of action.
General
- Layout - Choose a layout for the "Call to Action".
- Set Content in Grid - Set this option to "Yes" if you would like the call to action content to be in grid.
- Content Elements Proportion - Set proportions for the call to action content.
- Button Text - Enter the text you would like displayed on the button.
- Content - Enter the text you would like displayed on your call to action.
Button Style
- Button Top Margin - Set a top margin for the button. This option is only available when using the "Simple" layout for your call to action.
- Button Type - Choose a type of button to use in the call to action.
- Button Size - Choose a predefined size for your button.
- Button Link - Input a link for the button to lead to.
- Button Link Target - Choose whether you would like the link to open in the same browser tab or a new browser tab.
- Button Color - Set a color for the button text.
- Button Hover Color - Set a color for the button text on hover.
- Button Background Color - Set a background color for the button.
- Button Hover Background Color - Set a background color for the button on hover.
- Button Border Color - Set a color for the button border.
- Button Hover Border Color - Set a color for the button border on hover.
Clients Boxes
You can use this shortcode to display your clients in a grid layout.
- Number of Columns - Choose the number of columns you would like to display the clients in.
- Items Hover Animation - Choose a hover animation for the client items.
After you have set up your Clients Boxes shortcode, you can start adding Clients Boxes Items inside it ad setting the following options for each one:
- Image - Upload an image.
- Hover Image - Upload an image to display on hover.
- Image Size - Enter a size for the image in a "WidthxHeight" format (e.g. 200x200).
- Custom Link - Input the URL you would like the image to lead to when clicked on.
- Custom Link Target - Choose whether you would like the link to open in the same browser tab or in a new browser tab.
Clients Carousel

You can use this shortcode to display your clients in a carousel slider.
- Number of Visible Items - Choose how many items you would like to be visible on screen at the same time.
- Enable Slider Loop - Set this option to "Yes" if you would like the carousell to loop back to the first slide after it shows the last slide.
- Enable Slider Autoplay - Set this option to "Yes" if you would like the carousel to automatically change slides.
- Slide Duration - Set how long (in milliseconds) a slide will stay on screen before switching to the next slide.
- Slide Animation Duration - Set a duration (in milliseconds) for the slide transition animation to last.
- Enable Slider Navigation Arrows - Set this option to "Yes" if you would like to display navigation arrows on the slider.
- Enable Slider Pagination - Set this option to "Yes" if you would like to enable pagination bullets on the slider.
- Items Hover Animation - Choose a hover animation for the client items.
After you have set up your Clients Carousel you can start adding Clients Carousel Items into it and setting the following options for each one:
- Image - Upload an image.
- Hover Image - Upload an image to display on hover.
- Image Size - Enter a size for the image in a "WidthxHeight" format (e.g. 200x200).
- Custom Link - Input the URL you would like the image to lead to when clicked on.
- Custom Link Target - Choose whether you would like the link to open in the same browser tab or in a new browser tab.
Countdown
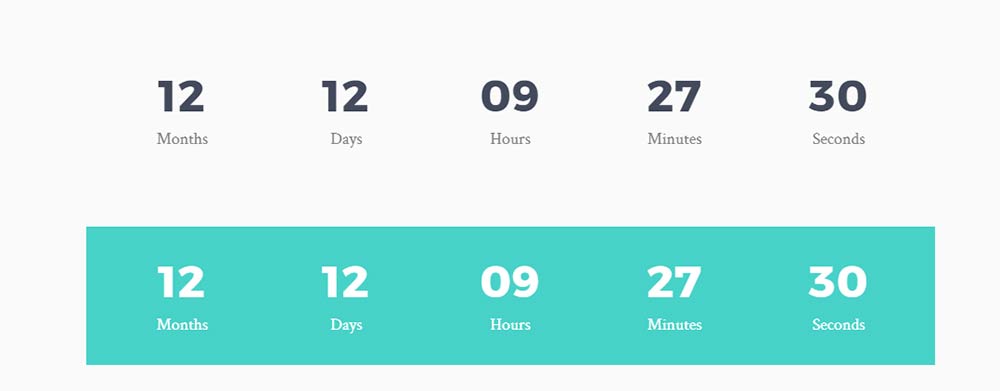
The countdown shortcode provides a great way to display a countdown timer on your page.
General
- Skin - Choose a skin for the countdown.
- Date Format - Choose a format for the date.
- Year - Set a year to countdown to.
- Month - Set a month to countdown to.
- Day - Set a day to countdown to.
- Hour - Set an hour to countdown to.
- Minute - Set a minute to countdown to.
- Month Label - If you would like to change the "Month" label, input your desired text here.
- Day Label - If you would like to change the "Day" label, input your desired text here.
- Hour Label - If you would like to change the "Hour" label, input your desired text here.
- Minute Label - If you would like to change the "Minute" label, input your desired text here.
- Second Label - If you would like to change the "Second" label, input your desired text here.
- Digit Font Size - Set a font size for the digits.
- Label Font Size - Set a font size for the labels.
Counter

Counters are great for communicating information in the form of numbers.
General
- Type - Choose a type for the counter.
- Digit - Enter a digit to count to.
- Digit Font Size - Enter a font size for the digits.
- Digit Color - Set a color for the digit.
- Custom Image - Upload an image for the counter item.
- Image Size - Set a size for the image.
- Title - Enter a title for the counter.
- Title Tag - Chose a heading tag for the counter title.
- Title Color - Set a color for the title.
- Title Top Margin - Set a top margin for the title.
Elements Holder
The Elements Holder shortcode allows you to display any combination of elements in an organized column structure.
- Enable Holder Full Height - Set this option to "Yes" if you would like the holder to take up the full height of the screen.
- Background Color - Set a background color for the elements holder.
- Columns - Choose a number of columns for the elements holder.
- Items Float Left - Check the "Make Items Float Left?" checkbox to float the element holder items to the left.
- Switch to One Column - Choose at which stage (screen size) you would like the element holder items to switch to one column.
- Choose Alignment in Responsive Mode - Choose an alignment for the content in responsive mode.
After you have set up your elements holder, you can add Elements Holder Items to it, and edit the following fields:
General
- Background Color - Set a background color for the elements holder item.
- Background Image - Set a background image for the elements holder item.
- Padding - Set a padding for the elements holder item.
- Horizontal Alignment - Choose a horizontal alignment.
- Vertical Alignment - Choose a vertical alignment.
- Animation Type - Choose an animation to use on this Elements Holder Item.
- Animation Delay - Set a delay time (in milliseconds) for the animation.
Width and Responsiveness
In this tab you can define paddings for the Elemnts Holder Item ona various stages (screen sizes).
Gallery Blocks
You can use this shortcode to create a stylized image gallery with a featured image.
- Images - Upload the images you would like to display. The first image you upload will be set as the featured image if you set a Featured Image Size.
- Featured Image Size - Set a size for the featured image in a "Widthx Height" format (e.g. 500x500).
- Image Size - Set a size for the images in a "Widthx Height" format (e.g. 200x200).
- Enable Lightbox Functionality - Set this option to "Yes" if you would like the images to open in a lightbox in their original sizes when clicked on.
- Space Between Columns - Set a predefined spacing between the columns.
Google Map
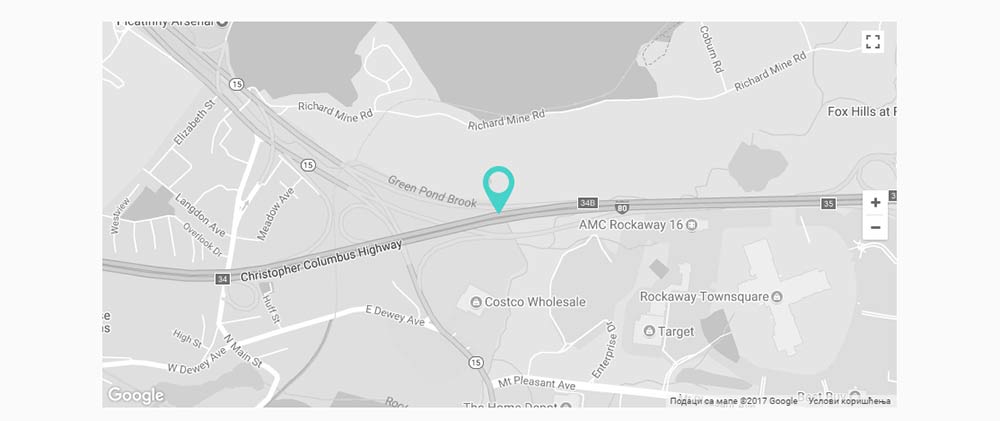
You can use this shortcode to display a Google Map anywhere on the page.
- Address 1 - Input an address to show on the map.
- Custom Map Style - Set this option to "Yes" if you would like to enable custom styling of the map.
- Color Overlay - Set a color overlay for the map.
- Saturation - Choose a level of saturation from -100 to 100
- Lightness - Choose a level of lightness from -100 to 100
- Pin - Choose a pin (location marker) to be used on the map.
- Map Zoom - Enter a zoom factor for the map (0 = whole world visible; 19 = individual buildings visible)
- Zoom Map on Mouse Wheel - Set this option to "Yes" if you would like users to be able to zoom the map with their mouse wheel.
- Map Height - Set a height for the map.
Icon
Icons are great for communicating all sorts of information.
- Icon Pack - Choose an icon pack.
- Icon - Choose an icon.
- Size - Choose a predefined size for your icon.
- Custom Size - Enter a custom size for your icon.
- Type - Choose an icon type.
- Border Radius - Set a border radius for the "Square" icon type.
- Shape Size - Set a size for the icon shape when using the "Circle" or "Square" icon types.
- Icon Color - Set a color for the icon.
- Border Color - Enter a color for the border when using the "Circle" or "Square" icon types.
- Border Width - Set a width for the border when using the "Circle" or "Square" icon types.
- Background Color - Set a background color when using the "Circle" or "Square" icon types.
- Hover Icon Color - Set a hover color for the icon.
- Hover Border Color - Set a hover color for the border when using the "Circle" or "Square" icon types.
- Hover Background Color - Set a hover color for the background when using the "Circle" or "Square" icon types.
- Margin - Enter a margin for the icon in a top, right, bottom, left format (ex.: "10px 20px 10px 20px").
- Icon Animation - Set this option to "Yes" if you would like to animate the icon.
- Icon Animation Delay - Set a delay time for the icon animation (in milliseconds).
- Link - Input a URL that you would like the icon to lead to when clicked.
- Use Link as Anchor - Check the "Use this icon as Anchor" checkbox if you would like to use the icon as an anchor link.
- Target - Choose a target for the icon link.
Icon List Item
Icon List Items allow you to make lists using icons, rather than numbers or bullets.
- Icon List Item Bottom Margin - Set a bottom margin for the icon list item element.
- Icon Pack - Choose an icon pack.
- Icon - Choose an icon.
- Icon Size - Set a size for the icon.
- Icon Color - Choose a color for the icon.
- Title - Enter a title for the icon list item.
- Title Size - Set a title size.
- Title Color - Choose a title color.
- Title Left Padding - Set a left padding for the title.
Icon With Text
This shortcode allows you to easily add icons with text to your page.
General
- Type - Choose a type of Icon with Text to use.
- Icon Pack - Choose an icon pack.
- Icon - Choose an icon.
- Custom Icon - Optionally, upload your own custom icon.
- Title - Enter a title.
- Text - Enter some text.
- Link - Enter a link.
- Target - Set a target for the link.
Icon Settings
- Icon Type - Choose a type for your icon (This option won't take effect when Icon Position is set to "Top". In This case Icon Type is "Normal").
- Icon Size - Choose a predefined size for your icon.
- Custom Icon Size - Set a custom size for the icon.
- Shape Size - Enter a size for the icon shape.
- Icon Color - Set a color for the icon.
- Icon Hover Color - Set a hover color for the icon.
- Icon Background Color - Set a background color for the icon.
- Icon Hover Background Color - Set a hover color for the icon background.
- Icon Border Color - Set a border color for the icon.
- Icon Border Hover Color - Set a hover color for the icon border.
- Border Width - Set a width for the icon border.
- Icon Animation - Set this option to "Yes" if you would like to animate the icon.
- Icon Animation Delay - Set a delay time for the animation (in milliseconds).
Text Settings
- Title Tag - Set a heading tag for the title text.
- Title Color - Set a color for the title.
- Title Top Margin - Set a top margin for the title.
- Text Color - Set a color for the text.
- Text Top Margin - Set a top margin for the text.
- Text Padding - Set a padding for the text. Please input the padding in a "top right bottom left" format (e.g. 5px 10px 5px 10px).
Single Image
You can use this shortcode to add single images to your pages.
- Image - Upload your image.
- Image Size - Set a size for the image.
- Enable Image Shadow - Set this option to "Yes" to enable a shadow animation on the image.
- Image Behavior - Choose how you would like the image to behave when clicked on.
- Custom Link - Input a custom link for the image to lead to.
- Custom Link Target - Choose whether you would like the link to open in the same browser tab or in a new browser tab.
Image Gallery

You can use the Image Gallery to display a grid or slider gallery of your images.
General
- Gallery Type - Choose the type of gallery you would like to use.
- Images - Upload the images for your gallery.
- Image Size - Enter an image size. You can either use one of the predefined sizes (thumbnail, medium, large, full), or enter a custom size in pixels (e.g. 200x300).
- Enable Image Shadow - Set this option to "Yes" to enable a shadow effect on the images.
- Image Behavior - Choose how you would like the image to behave when clicked on.
- Custom Links - If you would like the images to be linked, you can input the links here. The first link you input will be applied to the first image, the second link to the second image, etc. Please make sure to delimit the links with a comma.
- Custom Link Target - Choose whether you would like the links to open in the same browser tab or in a new browser tab.
- Number of Columns - Choose a number of columns (when using the "Image Grid" gallery type).
- Space Between Columns - Choose a predefined spacing between columns.
Slider Settings
- Number of Items Visible - Choose how many items to display in the slider at the same time (when using the "Carousel" gallery type).
- Enable Slider Loop - Set this option to "Yes" if you would like the slider to loop back to the first slide after displaying the last slide.
- Enable Slider Autoplay - Set this option to "Yes" if you would like the slider to automatically change slides.
- Slide Duration - Set a duration time (in milliseconds) for each slide to stay on screen before switching to the next slide.
- Slide Animation Duration - Set a duration time (in milliseconds) for the animation between slides.
- Enable Slider Navigation Arrows - Set this option to "Yes" if you would like to show navigation arrows on the slider.
- Enable Slider Pagination - Set this option to "Yes" if you would like to show pagination on the slider.
Image with Text
You can use this shortcode to create an image with some accompanying text.
- Image - Upload the image you would like to use.
- Image Size - Enter an image size. You can either use one of the predefined sizes (thumbnail, medium, large, full), or enter a custom size in pixels (e.g. 200x300).
- Enable Image Shadow - Set this option to "Yes" to enable a shadow effect on the images.
- Image Behavior - Choose a default behavior for the image.
- Custom Link - If you choose the "Open Custom Link" behavior type in the field above, you can input your custom link here.
- Custom Link Target - Choose whether you would like the custom link to open in the same browser tab or in a new browser tab.
- Title - Input a title.
- Title Tag - Choose a heading tag for the title.
- Title Color - Set a color for the title.
- Title Top Margin - Set a top margin for the title.
- Text - Input the text you would like to displya alongside the image.
- Text Color - Set a color for the text.
- Text Top Margin - Set a top margin for the text.
Message Box
You can use this shortcode to create a message which the user can close if they want to.
- Type - Choose a type of message box to use.
- Icon Pack - Choose an icon pack to use.
- Icon - Choose an icon.
- Icon Color - Set a color for the icon.
- Icon Background Color - Set a background color for the icon.
- Background Color - Set a background color for the message box.
- Border Color - Set a color for the message box border.
- Border Width - Set a width (in pixels) for the border.
- Close Mark Color - Set a color for the close (X) mark.
- Content - Input the content you would like to display in the message box.
Pie Chart
Pie Charts are great for communicating information in a visual and easy to understand manner.
- Percentage - Input a percentage to be displayed in the pie chart.
- Percentage Color - Set a color for the percentage.
- Pie Chart Active Color - Set a color for the active part of the pie chart.
- Pie Chart Inactive Color - Set a color for the inactive part of the pie chart.
- Pie Chart Size - Set a size for the pie chart.
- Title - Enter a title for the pie chart.
- Title Tag - Set a heading tag for the title.
- Title Color - Set a color for the title.
- Text - Enter text for the pie chart.
- Text Color - Set a color for the text.
Pricing Tables
Pricing Tables are a great way to present your business' pricing packages.
- Number of Columns - Choose a number of columns to display your pricing tables in.
- Space Betwen Columns - Choose a predefined spacing between columns.
After you have chosen the number of columns and spacing, you can add separate pricing tables and set up the following options:
- Content Background Color - Set a background color.
- Title - Enter a title for the pricing table.
- Title Color - Set a color for the title.
- Title Bottom Border Color - Set a color for the title bottom border.
- Price - Enter a price.
- Price Color - Set a color for the price.
- Currency - Enter your desired currency sign.
- Currency Color - Set a color for the currency sign.
- Price Period - Enter the period (time span) for the price.
- Price Period Color - Set a color for the price period.
- Button Text - Enter text for your button.
- Button Link - Enter a link for the button.
- Button Type - Choose a type of button to use.
- Button Skin - Choose a skin for the button.
- Content - enter your pricing table content.
Progress Bar
The Progress Bar element is great for communicating a large amount of information in a visual and easy to understand manner.
- Percentage - Enter a percentage to display on the progress bar.
- Title - Enter a title for the progress bar.
- Title Tag - Choose a heading tag for the title.
- Title Color - Set a color for the title text.
- Active Color - Set a color for the active part of the progress bar.
- Inactive Color - Set a color for the inactive part of the progress bar.
Section Title
You can use this shortcode to add a title to any section.
General
- Type - Choose a type of section title to use.
- Horizontal Position - Choose a horizontal alignment for the section title.
- Title - Text Position - Choose a position for the title and text when using the "Two Columns" type of section title.
- Space Between Columns - Choose a predefined spacing between columns when using the "Two Columns" type of section title.
- Content Side Padding - Set a left and right padding for the section title content.
- Content Alignment - Choose an alignment for the content.
- Title - Input your title.
- Title Watermark - Input text for the title watermark.
- Tagline - Input a tagline.
- Text - Input some text.
Title Style
- Title Tag - Choose a heading tag for the title.
- Title Color - Set a color for the title.
- Title Watermark Color - Set a color for the title watermark.
- Title Watermark Font Size - Set a font size for the title watermark.
Tagline Style
- Tagline Tag - Choose a heading tag for the tagline.
- Tagline Color - Set a color for the tagline.
- Tagline Bottom Margin - Set a bottom margin for the tagline.
Text Style
- Text Tag - Enter a heading tag for the text.
- Text Color - Set a color for the text.
- Text Top Margin - Set a top margin for the text.
Separator
Use the separator shortcode to create a visual divider between elements and sections on your pages.
- Custom CSS Class - If you wish to style a particular content element differently, you can use this field to add an extra class name to that element and then refer to that class name in your css file.
- Type - Choose a type for your separator.
- Position - Choose a position for the separator.
- Color - Set a color for the separator.
- Style - Set a border style for the separator.
- Width - Set a width for the separator.
- Thickness - Set a thickness for the separator.
- Top Margin - Set a top margin for the separator.
- Bottom Margin - Set a bottom margin for the separator.
Social Share
You can use this shortcode to add social share icons to pages.
- Type - Choose a type of social share.
- Icons Type - Choose a type for your icons.
- Social Share Title - Input a title for the social share element.
Tabs
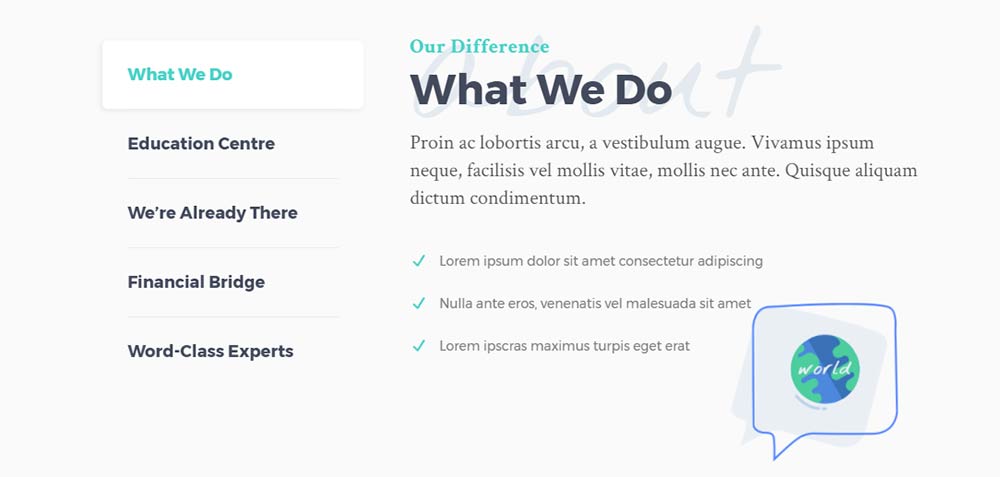
Tabs allow you to organize your content and display only what is necessary at a particular moment. After you have added the Tabs shortcode to your page, you can start adding individual tabs and changing the following settings for each tab:
- Title - Set a title for this tab.
Now you can add content to the tab. You can insert any shortcode inside the tab.
Vertical Split Slider
- Enable Scrolling Animation - Set this option to "Yes" to enable an animation on scroll.
- Background Color – Set a background color for the Slide Content Item.
- Background Image – Set a background image for the Slide Content Item.
- Padding – Set a padding for your Slide Content Item. Please insert the padding in a "top right bottom left" format (e.g. 5px 10px 5px 10px).
- Content Alignment – Set an alignment for the content of your Slide Content Item.
- Header/Bullets Style - Choose a skin style for the header and navigation bullets for this item.
Product List
You can use this shortcode to display a list of your shop products.
General
- Type - Choose a layout for the product list.
- Product Info Position - Choose a position for the product information.
- Number of Products - Choose the number of products you would like to display in the list.
- Number of Columns - Choose a number of columns to display your products in.
- Space Between Items - Choose a predefined spacing between products.
- Order By - Choose how you would like to order the products in the list.
- Order - Choose between an ascending and descending order for your products.
- Choose Sorting Taxonomy - If you would like to display only certain products, this is where you can select the criteria by which you would like to choose which products to display.
- Enter Taxonomy Values - Depending on what you chose in the Choose Sorting Taxonomy field, input the values (category slugs, tags, or post IDs) of the products you would like to display in the list.
- Image Proportions - Choose proportions for your featured images.
Product Info
- Display Title - Set this option to "Yes" if you would like to display the titles of your products.
- Display Category - Set this option to "Yes" if you would like to display the categories of your products.
- Display Excerpt - Set this option to "Yes" if you would like to display textual excerpts on the products in the list.
- Display Rating - Set this option to "Yes" if you would like to display product ratings on your list.
- Display Price - Set this option to "Yes" if you would like to display the prices of your products.
- Display Button - Set this option to "Yes" if you would like to display a button on the products in your list.
Product Info Style
- Product Info Skin - Choose between a light and dark skin for the product info sections.
- Title Tag - Set a heading tag for your product titles.
- Title Text Transform - Choose a text transform style for your product titles.
- Button Skin - Choose between a dark and light skin for the button.
- Shader Background Color - Set a color for the shader overlay.
Product List - Carousel
You can use this shortcode to display your shop products in a carousel.
General
- Type - Choose a layout for the product list carousel.
- Number of Products - Choose the number of products you would like to display in the carousel
- Space Between Items - Choose a predefined spacing between products.
- Order By - Choose how you would like to order the products in the carousel.
- Order - Choose between an ascending and descending order for your products.
- Choose Sorting Taxonomy - If you would like to display only certain products, this is where you can select the criteria by which you would like to choose which products to display.
- Enter Taxonomy Values - Depending on what you chose in the Choose Sorting Taxonomy field, input the values (category slugs, tags, or post IDs) of the products you would like to display in the list.
- Image Proportions - Choose proportions for your featured images.
Slider Settings
- Number of Visible Items- Choose a number of items to display at the same time in the carousel.
- Enable Slider Loop - Set this option to "Yes" if you would like the carousel to loop back to the first slide after it has displayed the last slide.
- Enable Slider Autoplay - Set this option to "Yes" if you would like the carousel to automatically switch slides.
- Slide Duration - Set a duration (in milliseconds) for a slide to stay active before switching to the next slide.
- Slide Animation Duration - Set a speed (in milliseconds) for the animation between slides.
- Enable Slider Navigation Arrows - Set this option to "Yes" if you would like to display navigation arrows on the slider.
- Slider Navigation Skin - Choose a skin for the navigation arrows.
- Enable Slider Pagination - Set this option to "Yes" to enable pagination bullets on the slider.
- Slider Pagination Skin - Choose a skin for the pagination bullets.
- Slider Pagination Position - Choose a position for the pagination bullets.
Product Info
- Display Title - Set this option to "Yes" if you would like to display the titles of your products.
- Display Category - Set this option to "Yes" if you would like to display the categories of your products.
- Display Excerpt - Set this option to "Yes" if you would like to display textual excerpts on the products in the carousel.
- Display Rating - Set this option to "Yes" if you would like to display product ratings on your carousel.
- Display Price - Set this option to "Yes" if you would like to display the prices of your products.
- Display Button - Set this option to "Yes" if you would like to display a button on the products in your carousel.
Product Info Style
- Title Tag - Set a heading tag for your product titles.
- Title Text Transform - Choose a text transform style for your product titles.
- Button Skin - Choose between a dark and light skin for the button.
- Shader Background Color - Set a color for the shader overlay.
Product List - Simple
You can use this shortcode to display a list of your shop products with a simple layout.
- Type - Choose the type of products you would like to display in the list.
- Number of Products - Choose the number of products you would like to display in the list.
- Order By - Choose how you would like to order the products in the list.
- Order - Choose between an ascending and descending order for your products.
- Display Title - Set this option to "Yes" if you would like to display the titles of your products.
- Title Tag - Set a heading tag for your product titles.
- Title Text Transform - Choose a text transform style for your product titles.
- Display Rating - Set this option to "Yes" if you would like to display product ratings on your list.
- Display Price - Set this option to "Yes" if you would like to display the prices of your products.
Parallax
You can use this shortcode to create parallax sections.
- Custom CSS Class - If you wish to style this element differently, you can use this field to add an extra class name to that element and then refer to that class name in your css file.
- Parallax Background Image - Upload a background image for this section. The parallax effect will be applied to this image.
- Parallax Speed - Set a speed (in milliseconds) for the parallax effect.
- Parallax Section Height - Set a height for the parallax section.
- Set Parallax Content Vertical Alignment In Middle - If you would like the content of the parallax section to be aligned to the vertical center of the section, set this option to "Yes".
- Disable Parallax For Touch Devices - Set this option to "Yes" to disable the parallax effect on touch devices.
Custom Font
You can use this shortcode to create a textual section using a custom font.
- Title Text - Input a title.
- Title Tag - Choose a heading tag for the text.
- Font Family - Input the name of the font family you would like to use.
- Font Size - Set a font size for the text.
- Line Height - Set a line height for the text.
- Font Weight - Choose a font weight for the text.
- Font Style - Choose a font style for the text.
- Letter Spacing - Input a letter spacing for the text.
- Text Transform - Choose a text transform style.
- Text Decoration - Choose a text decoration style.
- Color - Set a color for the text.
- Text Align - Choose a text alignment for the text.
- Margin - Set margin values for the custom font text. Please input the margin in a "top right bottom left" format (e.g. 5px 10px 5px 10px).
In the remaining tabs, you can set a font size and line height for each responsive breakpoint.
Expanded Gallery
You can use this shortcode to create an interactive image gallery.
- Number of Images - Choose a number of images to display in the gallery.
- Images - Upload your images. Please note that the images should all be the same size.
- Custom Link - If you would like your images to lead to some other pages, you can input the links to those pages here. The first link you input will be attributed to your first image, the second link to your second image, etc. Please delimit the links with commas.
- Custom Link Target - Choose whether the links will open in the same browser tab or in a new browser tab.
Stacked Images
You can use this shortcode to create an image gallery with a stacked effect.
- Image - Upload an image to display behind the stack image.
- Stack Image - Upload the image you would like to display at the top of the stack.
- Stack Image Position - Set a position for the stacked image.
Full Screen Sections
You can use this shortcode to create a showcase with multiple scrolling full screen sections.
- Enable Continuous Scrolling - Set this option to "Yes" if you would like the full screen sections to return to the first section after having displayed the last section.
- Enable Navigation Arrows - Set this option to "Yes" if you would like to display navigation arrows on the full screen sections.
- Enable Pagination Dots - Set this option to "Yes" if you would like to display pagination bullets on the full screen sections.
After you have set up the Full Screen Sections holder shortcode, you can start adding Full Screen Section Items inside it and setting the following options for each one:
General
- Background Color - Choose a background color for this section.
- Background Image - Upload a background image for this section.
- Background Image Position - Enter a horizontal and vertical position for the image (e.g. "center center").
- Background Image Size - Choose a predefined size for the background image.
- Content Padding - Input padding values for the content. Please input the padding in a "top right bottom left" format (e.g. "5px 10px 5px 10px").
- Content Vertical Alignmemt - Choose a vertical alignment for the content.
- Content Horizontal Alignment - Choose a horizontal alignment for the content.
- Link - If you would like the item to lead to some other page when clicked on, input the link you would like it to lead to here.
- Custom Link Target - Choose whether you would like the link to open in the same browser tab or in a new browser tab.
- Header and Navigation Skin - Choose a skin for the header and navigation arrows/bullets in this section.
Responsiveness
In this tab you can upload background images of different sizes to display on different responsive stages.
Split Section
You can use this shortcode to create a section with an image on one side and some text and a button on the other.
General
- Image - Upload an image.
- Image Position - Choose a position for the image.
- Content Background Color - Set a background color for the content.
- Title - Input a title to display in the content section.
- Title Tag - Set a heading tag for the title.
- Title Color - Set a color for the title.
- Text - Input some text to display in the content section.
- Text Tag - Choose a heading tag for the text.
- Text Color - Set a color for the text.
- Text Top Margin - Set a top margin for the text.
- Button Text - Input the text you would like to display on the button.
- Responsive Breakpoint - Choose on which responsive stage you want the image and text content to be displayed one under the other.
Button Style
- Button Type - Choose a type of button to use.
- Button Size - Choose a predefined size for the button.
- Button Link - Input a link for the button to lead to when clicked on.
- Button Link Target - Choose whether you would like the link to open in the same browser tab or in a new browser tab.
- Button Color - Set a color for the button text.
- Button Hover Color - Set a hover color for the button text.
- Button Background Color - Set a background color for the button.
- Button Hover Background Color - Set a hover color for the button background.
- Button Border Color - Set a color for the button border.
- Button Hover Border Color - Set a hover color for the button border.
- Button Top Margin - Set a top margin for the button.
Course Features
You can use this shortcode to display the key features of a single course.
- Selected Course - Choose a course to display.
- Show Course Duration - Set this option to "Yes" if you would like to display the duration of the course.
- Show Course Units - Set this option to "Yes" if you would like to display the course units (lessons and quizzes).
- Show Course Students - Set this option to "Yes" if you would like to display the max number of students for this course.
- Show Course Passing Percentage - Set this option to "Yes" if you would like to display the required passing percentage for the course.
- Show Course Maximum Retakes - Set this option to "Yes" if you would like to display the maximum number of times a student can retake this course.
Course List
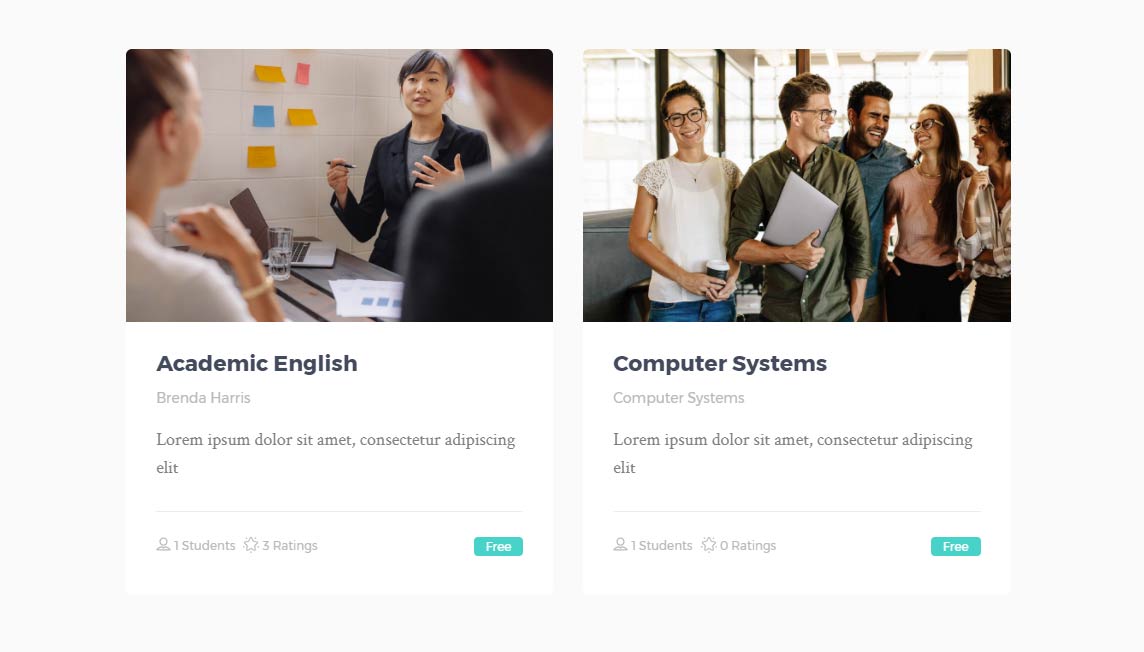
You can use this shortcode to display a list of your courses.
General
- Number of Columns - Set the number of columns in which you would like to display your course list.
- Space Between Courses - Choose a spacing between course items in the list.
- Number of Courses Per Page - Choose how many courses you would like to display per page. Enter "-1" do display all courses on a single page.
- Enable Image - Set this option to "Yes" if you would like to display the featured images of your courses.
- Image Proportions - Choose the proportions of the images in your course list.
- One-Category Course List - If you would only like to display courses from a single category, enter the category slug in this field.
- Show Only Courses with Listed IDs - If you would only like to display certain projects in your course list, enter the IDs of those projects in this field.
- One-Tag Courses List - If you would like to display courses with only a certain tag attached to them, you can enter the tag here.
- Order by - Choose how you would like to order your course items.
- Order - Choose between ascending and descending order.
Content Layout
- Item Style - Choose a style (layout and hover type) for the items in your course list.
- Enable Title - Set this option to "Yes" to display the course titles in the list.
- Title Tag - Choose a heading tag for the titles in your course list.
- Title Text Transform - Choose a text transform style for the title.
- Enable Instructor - Set this option to "Yes" if you would like to display the name of the instructor.
- Enable Price - Set this option to "Yes" to display the prices of your courses.
- Enable Excerpt - Set this option to "Yes" to display the excerpt on your course list.
- Excerpt Length - Set a maximum number of characters to display in the excerpt.
- Enable Students - Set this option to "Yes" if you would like to display the maximum number of students for this course.
- Enable Ratings - Set this option to "Yes" if you would like to display ratings on the course list.
- Enable Category - Set this option to "Yes" to display the categories on your course list.
Additional Features
- Pagination Type - Choose a pagination type to use.
- Load More Top Margin - Set a top margin for the "Load More" button when using the "Load More" type of pagination.
- Enable Filter - Set this option to "Yes" to enable a category filter above the course list.
- Enable Article Animation - Set this option to "Yes" to enable a content entry animation for projects in your course list.
Course Slider
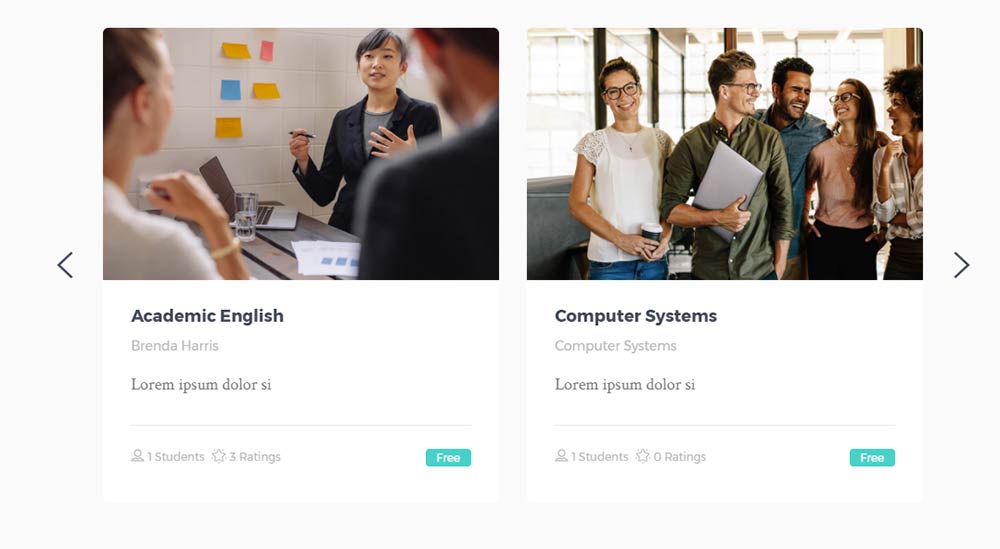
You can use this shortcode to display your courses in a slider layout.
General
- Number of Course Items - Set the number of course items you would like to display
- Number of Columns - Set a number of courses that will be displayed at the same time in the slider.
- Space Between Course Items - Set a spacing between course items in the slider.
- Image Proportions - Set proportions for your course featured images.
- One-Category Course List - If you would only like to display course from a single category, enter the category slug in this field.
- Show Only Courses with Listed IDs - If you would only like to display certain projects in your course slider, enter the IDs of those projects in this field.
- One-Tag Course List - If you would like to display courses with only a certain tag attached to them, you can enter the tag here.
- Order by - Choose how you would like to order your course items.
- Order - Choose between ascending and descending order.
Content Layout
- Enable Title - Set this option to "Yes" to display the course title in the slider.
- Title Tag - Choose a heading tag for the titles in your course slider.
- Title Text Transform - Set a text transform style for the title.
- Enable Instructor - Set this option to "Yes" if you would like to display the name of the instructor.
- Enable Price - Set this option to "Yes" to display the prices of your courses.
- Enable Excerpt - Set this option to "Yes" to display the excerpt on your course list.
- Excerpt Length - Set a maximum number of characters to display in the excerpt.
- Enable Students - Set this option to "Yes" if you would like to display the maximum number of students for this course.
- Enable Ratings - Set this option to "Yes" if you would like to display ratings on the course slider.
- Enable Category - Set this option to "Yes" to display the category in your course slider.
Slider Settings
- Enable Slider Loop - If you would like the slider to loop when it comes to the end of the course list, set this option to "Yes".
- Enable Slider Autoplay - Set this option to "Yes" if you would like the slider to automatically change slides.
- Slide Duration - Set a duration time (in milliseconds) for each slide to stay on screen before switching to the next slide.
- Slide Animation Duration - Set a duration time (in milliseconds) for the animation between slides.
- Enable Slider Navigation Arrows - Set this option to "Yes" to enable slider navigation arrows.
- Navigation Skin - Choose between a dark and light skin for the navigation arrows.
- Navigation Position - Choose a position for the navigation.
- Enable Slider Pagination - Set this option to "Yes" to enable pagination bullets on the slider.
- Pagination Skin - Choose between a dark and light skin for the pagination.
- Pagination Position - Choose a position for the pagination bullets.
Advanced Course Search
You can use this shortcode to display an advanced search form for courses on your website.
- Button Text - Input the text you would like to display on the button.
Course Table
You can use this shortcode to present a list of your courses in a table layout.
General
- One-Category Course List - If you would only like to display course from a single category, enter the category slug in this field.
- Show Only Courses with Listed IDs - If you would only like to display certain projects in your course slider, enter the IDs of those projects in this field.
- One-Tag Course List - If you would like to display courses with only a certain tag attached to them, you can enter the tag here.
- Order by - Choose how you would like to order your course items.
- Order - Choose between ascending and descending order.
Instructor
You can use this shortcode to showcase a single instructor.
- Instructor Layout - Choose a layout for the instructor.
- Select Instructor - Choose an instructor to display.
Instructor List
You can use this shortcode to display a list of your instructors.
General
- Number of Columns - Set the number of columns in which you would like to display your instructor list.
- Space Between Instructors - Choose a spacing between instructors in the list.
- Number of Instructors Per Page - Choose how many instructors you would like to display per page. Enter "-1" do display all instructors on a single page.
- One-Category Instructor List - If you would only like to display instructors from a single category, enter the category slug in this field.
- Show Only Instructors with Listed IDs - If you would only like to display certain instructors in your instructor list, enter the IDs of those instructors in this field.
- Order by - Choose how you would like to order your instructors.
- Order - Choose between ascending and descending order.
Content Layout
- Instructor Layout - Choose a layout for the items in the instructor list.
Instructor Slider
General
- Number of Columns in Row - Set the number of columns you would like to display in the slider at once.
- Space Between Instructors - Choose a spacing between instructors in the slider.
- Number of Instructors Per Page - Choose how many instructors you would like to display per page. Enter "-1" do display all instructors on a single page.
- One-Category Instructor List - If you would only like to display instructors from a single category, enter the category slug in this field.
- Show Only Instructors with Listed IDs - If you would only like to display certain instructors in your instructor list, enter the IDs of those instructors in this field.
- Order by - Choose how you would like to order your instructors.
- Order - Choose between ascending and descending order.
- Enable Slider Navigation Arrows - Set this option to "Yes" to display navigation arrows in the slider.
- Navigation Position - Choose a position for the navigation.
- Enable Slider Pagination - Set this option to "Yes" to display pagination bullets on the slider.
Content Layout
- Instructor Layout - Choose a layout for the items in the instructor slider.
Process

You can use this shortcode to display your creative or business process.
- Number of Columns - Choose a number of columns to display your process items in.
- Switch to One Column - Choose a t which responsive stage you would like the process items to be displayed in one column.
- Process Background Image - Set a background image for the process holder.
After you have set up the process shortcode, you can start adding process items into it and setting the following options for each one:
- Image - Upload an image for the process item.
- Custom Link - Set a link for the image to lead to when clicked on.
- Title - Input a title for this process item.
- Title Tag - Choose a heading tag for the title text.
- Title Color - Set a color for the title.
- Title Top Margin - Set a top margin for the title.
- Text - Input some text for this process item.
- Text Color - Set a color for the text.
- Text Top Margin - Set a top margin for the text.
Twitter List
You can use this shortcode to display a list of your tweets.
- User ID - Input your Twitter user ID. You can find your user ID at http://mytwitterid.com/
- Number of Columns - Choose a number of columns to display the tweets in.
- Space Between Columns - Choose a spacing between columns.
- Number of Tweets - Input the number of tweets you would like to display.
- Tweets Cache Time - Set a tweet cache time. If you leave the tweet cache time empty, then your tweets will not be stored in cache and each time the page is reloaded they will be requested from Twitter. The tweet cache time is defined in seconds (only a number should be entered without a time unit, i.e. if you enter 600 the cache time will be set to 600s).
Masonry Elements Holder
You can use this shortcode to create a masonry layout that can contain any other shortcodes.
- Columns - Choose a number of columns to display your masonry layout in.
Once you have set up the Masonry Elements Holder, you can start addin Masonry Elements Holder Items inside it and setting the following options for each one:
General
- Size - Choose a size for this item.
- Vertical Alignment - Choose a vertical alignment for the content of this item.
- Horizontal Alignment - Choose a horizontal alignment for the content of this item.
- Padding - Input padding values for the item. Please input the padding in a "top right botom left" format (e.g. 5px 10px 5px 10px).
- Background Color - Set a background color for the item.
- Background Image - Set a background image for the item.
Width & Responsiveness
Here you can set padding values for the item on different responsive breakpoints.
Now you can add some other shortcode into the Masonry Holder Item.
Service Table
You can use this shortcode to create a table displaying your services.
General
- Featured Column Title - Input a title for the "featured" column of the service table.
- Service Enabled - Choose whether you would like to enable a service. You can enable up to 3 services.
- Service Title - Input a title for the service.
- Service Price - Input a price for the service.
- Service Price Period - Input a price period (e.g. "monthly") for the service.
- Service Star Rating - Set a rating for the service.
- Service Button Text - Input some text to display on the button.
- Service Button Link - Input a link for the button to lead to.
Features
- Feature Title - Input title for your features. You can input up to 8 features.
Service
In the 3 service tabs you can define which features will be displayed as enabled for which service.
Timeline Holder
You can use this shortcode to create a timeline.
- Title - Input a title for your timeline.
Once you have set up the Timeline Holder, you can start adding timeline items inside it and setting the following options for each one:
- Title - Input a title for this item.
- Subtitle - Input a subtitle for this item.
8. Masonry Gallery
The Masonry Gallery is an attractive way to present your links and invite visitors to other sections of your site.
To create a masonry gallery, go to Masonry Gallery > Add New from the admin panel. Enter a title for your masonry gallery item in the text field near the top of the screen.

You can use the following fields to edit your masonry gallery item:
Elated Masonry Gallery General
- Title Tag - Choose a heading tag for the title.
- Text – Enter text to display over the masonry gallery item.
- Custom Item Icon - Upload an icon for this item.
- Link – Enter the URL that you would like this item to link to.
- Link target – Choose whether you would like the link to open in the same browser tab or a new browser tab.
Masonry Gallery Item Style
- Size – Choose from one of the predefined item sizes.
- Type – Your item can display with a button, with icon, or in standard format (with title only).
- Button Label – Enter a label for the button. This option applies when using the "With Button" item type.
- Content Background Skin - Choose a skin when using the "Simple" item type.
- Number of Items - Set how many items you would like to display in the Masonry Gallery.
- Space Between Items - Choose a predefined spacing between the items.
- Category – If you would like to display a specific category of masonry gallery items, enter the category slug in this field (ex. "art." You can find the category slug by navigating to Masonry Gallery > Masonry Gallery Categories from the admin panel and clicking on your category of choice). Alternatively, leave this field empty to show items from all categories.
- Order By - Choose how you would like to order the items.
- Order – You can choose between ascending and descending order.
9. LMS
In this section of the User Guide we will discuss how to use the Learning Management System, as well as how to add instructors and create courses, lessons, questions, and quizzes.
Adding Instructors
To add an instructor to your Learning Management System:
- Navigate to Elated Instructor > Add new from your WordPress admin panel.
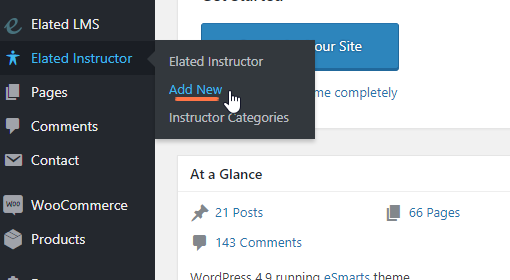
- Enter the Instructors name in the text field near the top of the page.
- Now to publish the item, click the Publish button.
On the right side of the screen are the Instructor Categories, and Featured Image sections. In the Instructor Categories section, you can assign the instructor to a category. In the Featured Image section, you can set an image to be displayed for this instructor.
Now that you have set up your first Instructor, let’s go over the available custom fields for Instructors (please note that we won't go through all the custom fields, since most of them are the same as on regular pages. We will only cover the Instructor specific custom fields here):
Elated Instructor Info
- Title - Input a title for this instructor.
- Brief Vita - Input a short resume for the instructor.
- Email - Input this instructors email address.
- Resume - Upload the instructors resume.
- Social Link - Add social links for this instructor.
Creating Lessons
To create lessons:
- Navigate to Elated LMS > Elated Lessons from your WordPress admin panel.
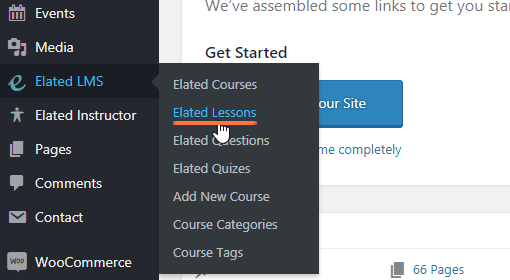
- Click the Add New button at the top of the screen.
- Enter a title for the lesson in the text field near the top of the page.
- Now to publish the item, click the Publish button.
You can add content to the lesson the same way you add content to your pages and blog posts.
Now you can set up your lesson using the following fields (please note that we won't go through all the custom fields, since most of them are the same as on regular pages. We will only cover the Lesson specific custom fields here):
Elated Lesson Settings
- Lesson Description - Input a description for the lesson.
- Lesson Duration - Input a duration for the lesson.
- Lesson Duration Parameter - Choose whether the duration will be in seconds, minutes, or hours.
- Free Lesson - Set this option to "Yes" if you would like this lesson to be free.
- Lesson Post Message - Input a message that will be displayed to the student when the lesson is complete.
- Lesson Type - Choose a type of lesson. Depending on the type of lesson you choose, you will be presented with fields in which you can choose the type of video or audio you will be using, and input links to your video or audio files.
Creating Quizzes
To create quizzes, you first need to create questions for the quizzes. To start creating questions:
- Navigate to Elated LMS > Elated Questions from your WordPress admin panel.
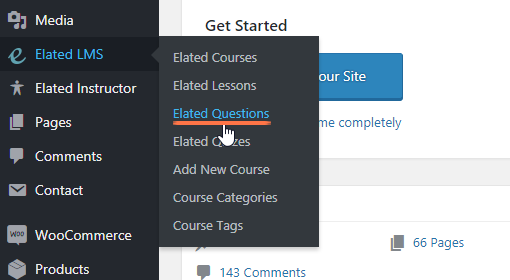
- Click the Add New button at the top of the screen.
- Enter a title for the question in the text field near the top of the page.
- Now to publish the item, click the Publish button.
Now you can set up your question using the following fields:
Elated Question Settings
- Question Description - Input a description for this question.
- Question Type - Choose the type of question you would like to create. Depending on the type of question you choose, you will be presented with a set of fields in which you can input the answers to your question and set up which answer or answers are correct.
- Question Mark - Input the mark that is given to the student for answering correctly.
- Question Hint - Optionally, input a hint that will help the student answer the question.
After you have set up all of your questions, you can start creating quizzes. To create a quiz:
- Navigate to Elated LMS > Elated Quizzes from your WordPress admin panel.
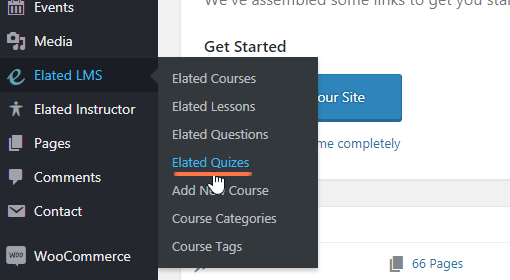
- Click the Add New button at the top of the screen.
- Enter a title for the question in the text field near the top of the page.
- Now to publish the item, click the Publish button.
Now you can use the following fields to set up your quiz:
Elated Quiz Questions
Here you can add questions to your quiz. To add a question, click the "Add Question" button and then choose the question you would like to add.
Elated Quiz Settings
- Quiz Description - Input a description for the quiz.
- Quiz Duration - Input a duration for the quiz.
- Quiz Duration Parameter - Choose whether the duration will be in seconds, minutes, or hours.
- Number of Retakes - Choose how many times a student can retake this quiz.
- Passing Percentage - Choose what percentage of answers the student needs to answer correctly in order to pass the quiz.
- Quiz Post Message - Input a message that will be displayed to the student after they complete the quiz.
Creating Courses
Now that you have set everything up, you can create your first course. To create a course:
- Navigate to Elated LMS > Add new Course from your WordPress admin panel.
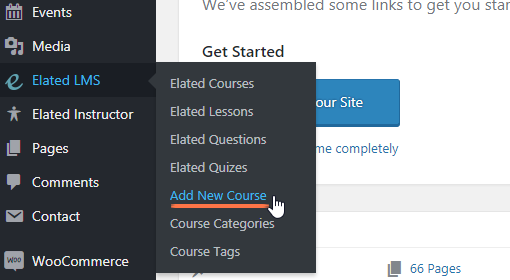
- Enter the name of the course in the text field near the top of the page.
- Now to publish the item, click the Publish button.
You can input a description of the course in the content field near the top of the screen. Anything you input here will be displayed in the Description tab of the course.
Now you can set up the course using the following fields (please note that we won't go through all the custom fields, since most of them are the same as on regular pages. We will only cover the Course specific custom fields here):
Elated Course Settings
- Show Title Area - Set this option to "Yes" if you would like to display the title area on course pages.
- Course Instructor - Choose an instructor for this course.
- Course Duration - Set a duration for the course.
- General Curriculum Description - Input a description of the course curriculum.
- Course Duration Paramater - Choose whether you would like the course duration to be in minutes, hours, days, or weeks.
- Maximum Students - Input the maximum number of students that can attend this course.
- Number of Re-Takes - Input how many times a student can retake this course.
- Featured Course - Set this option to "Yes" if you would like to mark this course as featured.
- Pre-Required Course - If there is a course the students should complete before taking this course, choose that pre-required course here.
- Passing Percentage - Choose what percentage of the course the student has to complete to get a passing grade.
- Free Course - Choose whether this course will be free or not.
- Price - Input the price for the course.
- Discount - Input a discount value for the course.
Elated Course Curriculum
In this section you can create the curriculum for your course by creating sections in which you can add your previously created lessons and quizzes.
10. Testimonials
In this section of the User Guide we will discuss how to create and how to add them to your website pages.
Testimonials are a great way to show potential clients what others are saying about your business.
To create a testimonial, navigate to Testimonials > Add New from your WordPress admin panel and enter a title for your testimonial in the text field near the top of the screen.
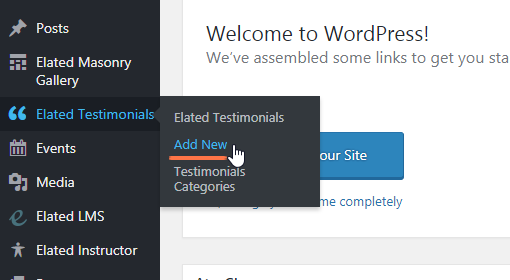
Elated Testimonials
Fill in the following fields to complete your testimonial:
- Text – Enter the testimonial text.
- Author – Enter the name of the testimonial’s author.
- Author Position - Enter the testimonial author's job position.
You can now assign your testimonial to a category. On the right side of the screen you will see a section named Testimonial Categories. Here you can select the category that you wish to add this testimonial to. If you would like to add a new category, click on the + Add New Testimonials Category link, and a text field will appear in which you can enter a name for your new category. Then click on Add New Testimonials Category.
After you have selected the categories you want to add this testimonial to, click the Publish button.
Finally, in order to display your testimonials on a page, go to that page from the backend and click the Add Elements button, and from the elements menu select Testimonials.
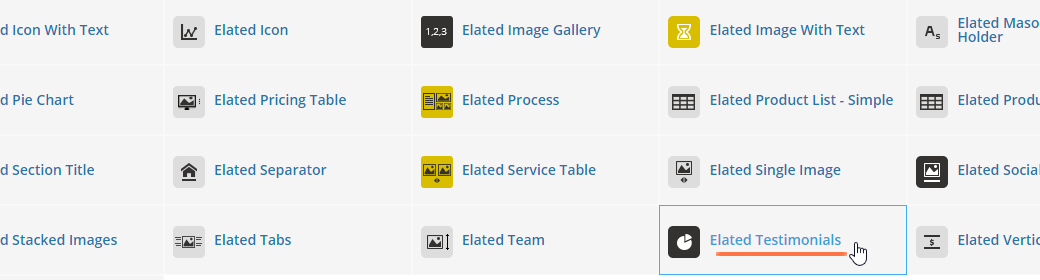
You can now edit how your testimonials display on the page by filling out the following fields:
General
- Type - Choose a type of testimonials to use.
- Skin - Choose a skin for the testimonials.
- Number of Testimoniasl – Choose the number of testimonials to display on the page.
- Category – If you would like to display a specific category of testimonials, enter the category slug in this field (You can find the category slug by navigating to Testimonials > Testimonials Categories from your WordPress admin panel and clicking on your category of choice). Alternatively, you can leave this field empty to show testimonials from all categories.
Slider Settings
- Number of Visible Items - Choose how many items you would like visible on screen at the same time. This option is only available when using the "Boxed" type of testimonials.
- Enable Slider Loop - Set this option to "Yes" if you would like the slider to loop back to the first slide after displaying the last slide.
- Enable Slider Autoplay - Set this option to "Yes" if you would like the slider to automatically change slides.
- Slide Duration - Set a duration time (in milliseconds) for one slide to stay on screen before switching to the next slide.
- Slide Animation Duration - Set a duration time (in milliseconds) for the slide animation.
- Enable Slider Navigation Arrows - Set this option to "Yes" to display navigation arrows on the slider.
- Enable Slider Pagination - Set this option to "Yes" to enable pagination bullets on the slider.
11. Widgets
In this section of the User Guide we will discuss the available widgets and widget areas in the theme.
Widgets are easy to manage and can be incredibly useful to have on your site.
For eSmarts, we have developed custom widgets and widget areas in order to provide you with even more functionality. You also have the option of creating your own custom sidebars (custom widget areas).
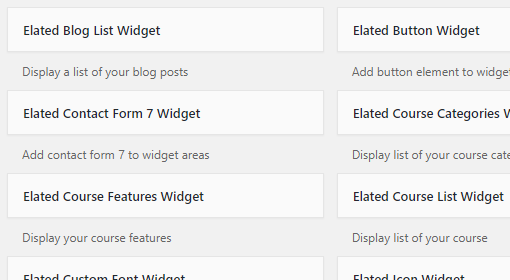
Widgets
- Elated Blog List - Use this widget to display a list of your blog posts in a widget area (for example in a sidebar).
- Elated Button Widget - Use this widget to easily add a button to a widget area.
- Elated Contact Form 7 Widget - Use this widget to add contact forms to your widget areas.
- Elated Course Category Widget - Use this widget to display your course categories in a widget area.
- Elated Course Features Widget - Use this widget to display the features of a specific course in a widget area.
- Elated Course List Widget - Use this widget to display a list of your courses in a widget area.
- Elated Custom Font Widget - Use this widget to add some stylized text to a widget area.
- Elated Icon Widget - Use this widget to easily add icons to widget areas.
- Elated Image Gallery Widget - Use this widget to easily add an image gallery to a widget area.
- Elated Login Widget - Use this widget to add a user login button the frontend of your website.
- Elated Product Categories - Use this widget to display your product categories in a widget area.
- Elated Search Opener - Use this widget to place the search icon in a desired widget area.
- Elated Search Post Type - Use this widget to create a search form that searches through a specific post type.
- Elated Separator Widget - Use this widget to easily add a separator to a widget area.
- Elated Side Area Opener - Use this widget to place the icon that opens the side area in a desired widget area.
- Elated Social Icon Widget - Use this widget to easily add social icons to a widget area.
- Elated Sticky Sidebar Widget - Use this widget to make the sidebar sticky. Drag it into the sidebar above the widget which you want to be the first element in the sticky sidebar.
- Elated Twitter Widget - To enable the Elated Twitter Widget, you first need to go to Elated Options > Social > Twitter, and click the "Connect with Twitter" button. This will open your browser and ask for permission to your Twitter feed.
After you have enabled permission, you can set the options for the widget, such as a Title for the widget, the user ID of the user whose tweets you would like displayed ( http://mytwitterid.com/ ), the number of tweets to display, whether to show the time the tweet was tweeted, and you can also set a tweet cache time. If you leave the tweet cache time empty, then your tweets will not be stored in cache and each time the page is reloaded they will be requested from Twitter. The tweet cache time is defined in seconds (only a number should be entered without a time unit, i.e. if you enter 600 the cache time will be set to 600s). If you have any issues with the Twitter feed, you can go to Elated Options > Social > Twitter, and click "Reconnect to Twitter". - Elated Instagram Widget - You can use this widget to display your Instagram feed. you first need to go to Elated Options > Social > Instagram, and click the "Connect with Instagram" button. This will open your browser and ask for permission to your Instagram feed.
After you have enabled permission, you will receive the options to set a title for the widget, define a tag if you would like to display images with only a certain hashtag in their description (caption), set the number of images you would like to display, define the number of columns, set one of three predefined image sizes, and set an images cache time. If you leave the image cache time empty, then your images will not be stored in cache and each time the page is reloaded they will be requested from Instagram. The image cache time is defined in seconds (only a number should be entered without a time unit, i.e. if you enter 600 the cache time will be set to 600s). If you have any issues with the Instagram feed, you can go to Elated Options > Social > Instagram, and click "Reconnect to Instagram". - Elated WooCommerce Dropdown Cart - You can use this widget to display a cart icon in a desired widget area which, when hovered over, will show a dropdown with a listing of the items in your cart.
Widget Area
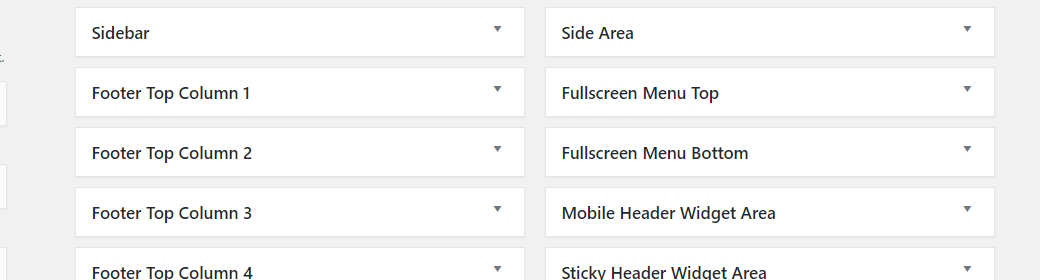
- Sidebar - This is the WordPress default sidebar widget area for blog posts.
- Footer Top Column 1, 2, 3 & 4 – You can use these widget areas to add widgets to the Footer Top columns.
- Footer Bottom Column 1& 2 – You can use these widget areas to add widgets to the Footer Bottom columns.
- Header Widget Logo Area - Use this widget area to add widgets to the header logo area.
- Header Widget Menu Area - Use this widget area to add widgets to the header menu area.
- Side Area - You can use this widget area to add widgets to your side area.
- Fullscreen Menu Top - You can use this widget area to add widgets above the fullscreen menu navigation.
- Fullscreen Menu Bottom - You can use this widget area to add widgets below the fullscreen menu navigation.
- Mobile Header Widget Area - You can use this widget area to add widgets to the mobile header.
- Sticky Header Widget Area - You can use this widget area to add widgets to the sticky header.
- Header Top Bar Left Column - You can use this widget area to add widgets to the left side of the top bar.
- Header Top Bar Right Column - You can use this widget area to add widgets to the right side of the top bar.
12. WooCommerce
In this section of the User Guide we will discuss how to install and set up the WooCommerce eCommerce plugin with eSmarts.
eSmarts comes with WooCommerce integration, which allows you to easily create an online shop. For more information on installing and configuring WooCommerce, please visit this page:
http://docs.woothemes.com/documentation/plugins/woocommerce/getting-started/
In order to set up WooCommerce with the eSmarts theme, follow these steps:
- Navigate to Plugins > Add New from your WordPress admin panel.
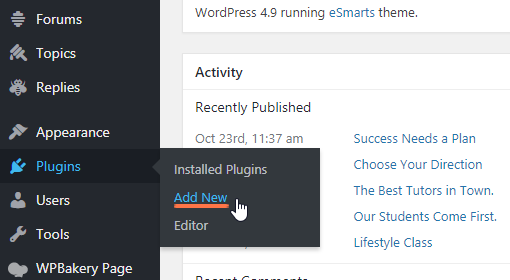
- Type “WooCommerce” in the search field.
- Locate "WooCommerce - excelling eCommerce" in the search results and click on Install Now.
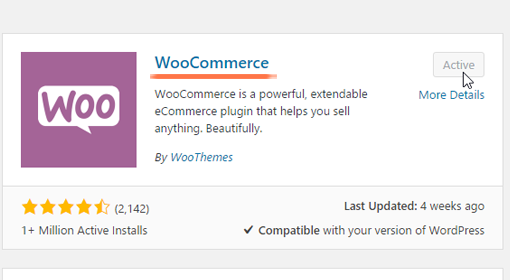
- Once the installation has completed, click on Activate Plugin.
- You will now see a notice saying “Welcome to WooCommerce – You're almost ready to start selling :)". If you plan on importing demo content, click on Skip Setup. Otherwise, click Install Pages.
- If you plan on importing demo content, you should first set the product image sizes in order to achieve the same look as on our demo sites. Navigate to WooCommerce > Settings and click the Products tab, and then the Display within the Products tab . Under the section Product Images, enter the same values that we did:
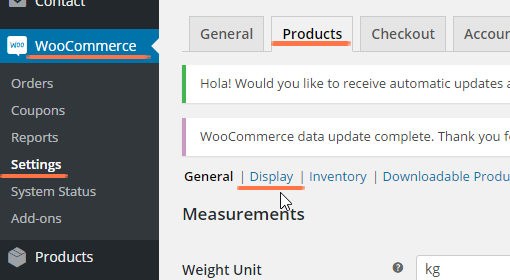
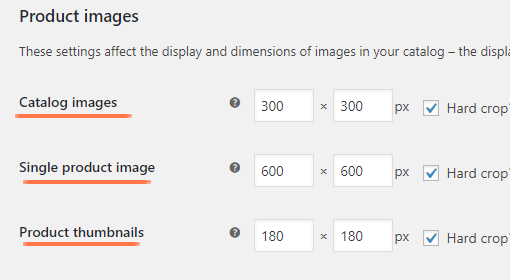
- See Importing Demo Content in the Getting Started section of this user guide and perform the process explained there.
- Create a page for your shop. Then navigate to WooCommerce > Settings > Products > Display and choose the page you create as your Shop Page (in the "Shop Page" field).
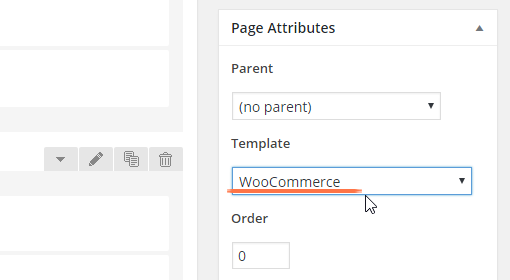
Creating Products
To create a new shop product, please navigate to Products > Add Product. Here you can set up all the standard WooCommerce options for each product, as well as some custom theme options:
Elated Product Meta
- Dismension for Product List Shortcode - Choose a layout for the featured image when this product is displayed in the Product List shortcode when it is set to the Masonry layout.
- Show Title Area - Choose whether to show a title area for this product or not.
- Disable Content Top Padding - Set this option to "Yes" if you want to disable the padding above the content.
13. Contact Form 7
In this section of the User Guide we will discuss how to install the Contact Form 7 plugin and how to add contact forms to your pages.
- Navigate to Plugins > Add New from your WordPress admin panel.

- Type "Contact Form 7" in the search field.
- Locate "Contact Form 7" in the search results and click on Install Now.
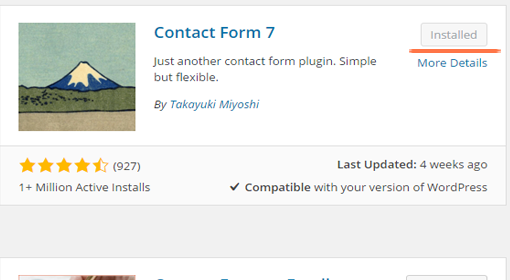
- Once installation is complete, click on Activate Plugin.
Now when you use Visual Composer while creating your pages, you will see a new shortcode in the list of shortcodes – the Contact Form 7 shortcode.
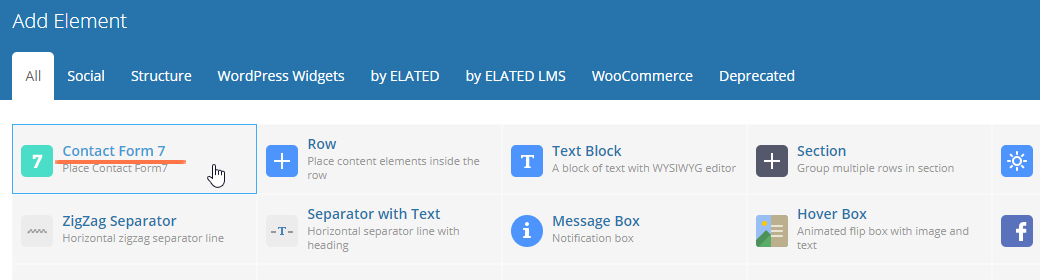
Click on this shortcode to add a contact form to your page. There are several fields to fill in:
- Form title – Enter text to use as the contact form title. Leave blank if no title is needed.
- Select Contact Form – Choose a previously created contact form from the drop down list.
- Style – You can style each form element individually in Elated Options > Contact Form 7. Here you can choose which of the predefined styles will be applied.
3rd Party Integration
If you wish to integrate a newsletter sending service, you need to additionally install a plugin called "Forms: 3rd-Party Integration." You can check out the link to their site here: https://wordpress.org/plugins/forms-3rdparty-integration/.
Once you've completed the installation process and activated this plugin, navigate to Contact > 3rdparty Services from your WordPress admin panel in order to set the options. For more information on setting up this plugin, check out the following link: https://wordpress.org/plugins/forms-3rdparty-integration/screenshots/.